Have you ever wondered what magic happens inside your speakers to produce those crystal-clear highs? One key player is the tweeter capacitor, a tiny but mighty component that shapes the sound you hear.
This post will uncover how tweeter capacitors work, their importance in achieving pristine audio reproduction, and how to choose the right ones for your system
What Is Tweeter Capacitor

A tweeter capacitor is an electronic component used in audio systems to:
- Protect Tweeters: It acts as a high-pass filter, blocking low-frequency signals from reaching the tweeter. Tweeters are designed to reproduce high-frequency sounds. Exposing them to low-frequency signals can damage their delicate voice coils and diaphragms.
- Improve Sound Quality: By filtering out unwanted low frequencies, the tweeter capacitor ensures that only the intended high-frequency signals reach the tweeter. This results in clearer, more accurate, and less distorted high-frequency reproduction.
How Do Tweeter Capacitors Work
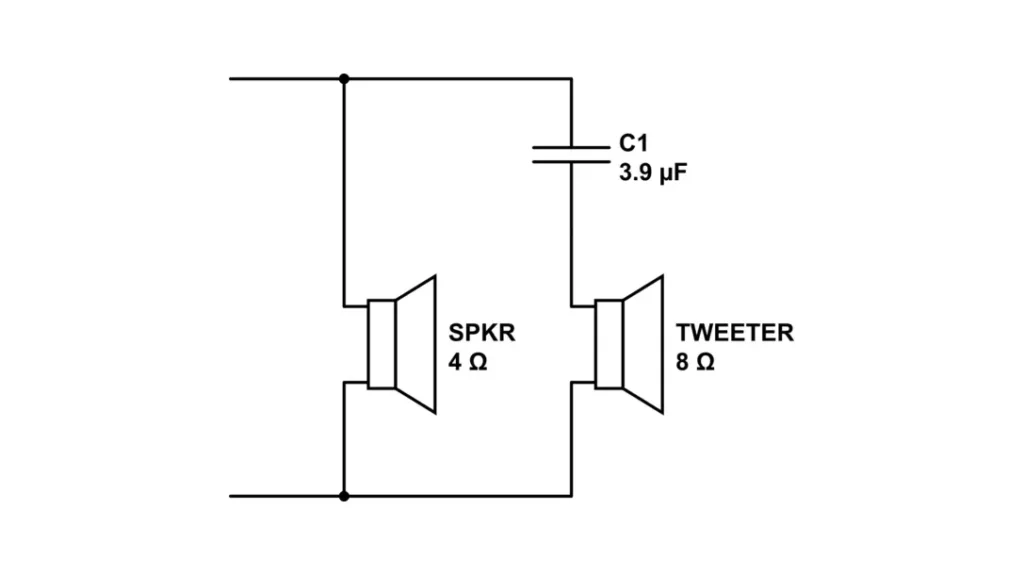
Tweeter capacitors work by acting as a high-pass filter in audio systems. Here’s a breakdown:
- Capacitive Reactance: Capacitors oppose changes in voltage. For high-frequency signals, the capacitor’s reactance (opposition to current flow) is low, allowing high-frequency signals to pass through relatively easily. For low-frequency signals, the capacitor’s reactance is high, significantly blocking their passage.
- Filtering Action:
- High Frequencies: High-frequency signals encounter low resistance from the capacitor, allowing them to pass through and reach the tweeter.
- Low Frequencies: Low-frequency signals encounter high resistance from the capacitor, effectively blocking them from reaching the tweeter.
Analogy:
Imagine a sieve. Small particles (high frequencies) pass through easily, while larger particles (low frequencies) are blocked. The capacitor acts similarly, allowing high frequencies to “pass through” and blocking low frequencies.
- The value of the capacitor determines the specific frequencies that are allowed to pass through.
- High-quality audio capacitors are crucial for accurate and distortion-free sound reproduction.
By effectively filtering out low-frequency signals, tweeter capacitors protect the delicate tweeters from damage and ensure that they reproduce high-frequency sounds accurately and efficiently.
Tweeter Capacitor Positive or Negative

Tweeter capacitors themselves do not have a fixed polarity.
- Polarity is only relevant for polarized capacitors, such as electrolytic capacitors.
- Tweeter capacitors are typically film capacitors or other non-polarized types. These can be installed without worrying about polarity.
Focus on Proper Wiring:
- Ensure the tweeter itself is wired correctly according to its polarity markings (usually indicated with a “+” or “-“).
- Proper wiring of the entire speaker system is crucial for correct phase alignment and optimal sound quality.
If you’re unsure about any aspect of speaker wiring or capacitor installation, it’s always best to consult with a qualified audio technician or refer to the manufacturer‘s instructions.
Here’s the table of the information about tweeter capacitor polarity:
| Capacitor Type | Polarity | Notes |
|---|---|---|
| Tweeter Capacitor (Film, etc.) | Non-Polarized | No positive or negative terminals. Can be connected either way. |
| Electrolytic Capacitor | Polarized | Has positive (+) and negative (-) terminals. Must be connected correctly to avoid damage. |
| Tweeter Itself | Polarized | Has positive (+) and negative (-) terminals. Correct polarity is essential for proper sound reproduction. |
How to Choose Capacitor for Tweeter
Selecting the appropriate tweeter capacitor is crucial for optimal audio performance and tweeter protection.
Here’s a breakdown of the key factors to consider capacitor for tweeter protection:
1. Capacitance Value:
Crossover Frequency: The primary factor influencing capacitor value is the desired crossover frequency (the point where the tweeter takes over from the midrange driver).
Formula: The basic formula for calculating the capacitor value is: Capacitance (Farads) = 1 / (2 * π * Frequency * Impedance)
- Frequency: The crossover frequency in Hertz.
- Impedance: The nominal impedance of the tweeter (usually 4 ohms or 8 ohms).
Example: For a 4-ohm tweeter and a desired crossover of 2,000 Hz: Capacitance = 1 / (2 * π * 2000 Hz * 4 ohms) ≈ 19.9 μF
2. Capacitor Type:
Quality Matters: Use high-quality audio capacitors designed for audio applications. Common choices include:
- Polypropylene: Excellent sound quality, low distortion, and good temperature stability.
- Polyester: A good balance of cost and performance.
- Metallized Film: Offers high capacitance values in a small package.
Avoid Electrolytic Capacitors: These are typically polarized and not suitable for tweeter circuits due to their potential for distortion and limited frequency response.
3. Voltage Rating:
- Amplifier Power: Choose a capacitor with a voltage rating that exceeds the peak voltage output of your amplifier. A higher voltage rating provides a safety margin.
4. Tolerance:
- Accuracy: Select capacitors with a tight tolerance (e.g., ±5% or ±10%) for more precise crossover frequency control.
5. Mounting:
- Consider the Space: Choose a capacitor with appropriate mounting options (through-hole or surface-mount) to fit your crossover network or speaker enclosure.
Visual Aid: Capacitor Selection Chart
Note: If you’re unsure about any aspect of capacitor selection or speaker design, consult with a qualified audio engineer or experienced DIY enthusiast.
By carefully considering these factors, you can choose the right tweeter capacitor to protect your tweeters, achieve accurate crossover, and enjoy optimal sound quality from your audio system.
How to Connect Capacitor to Tweeter

1. Gather Your Materials:
- Tweeter: The speaker unit you want to protect.
- Capacitor: The appropriately sized and rated capacitor for your tweeter.
- Soldering Iron and Solder: For creating secure connections.
- Heat Shrink Tubing (optional): To insulate the connections.
- Wire Strippers: To strip the insulation from the wires.
- Multimeter (optional): To test the connections.
2. Prepare the Tweeter:
- Locate the Terminals: Identify the positive (+) and negative (-) terminals on the tweeter. These are usually marked on the tweeter itself.
3. Connect the Capacitor:
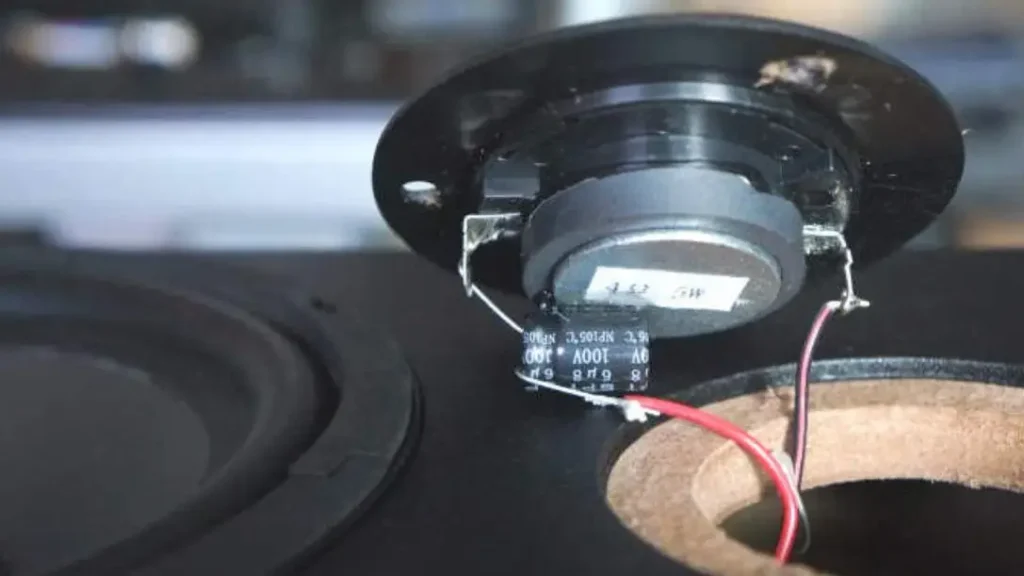
- Series Connection:
- Cut a short piece of wire.
- Solder one end of the wire to the positive terminal of the capacitor.
- Solder the other end of the wire to the positive terminal of the tweeter.
- Connect the negative terminal of the capacitor directly to the negative terminal of the tweeter.
Visual Aid:
4. Insulate the Connections (Optional):
- Shrink Tubing: Slide pieces of heat shrink tubing over the soldered connections.
- Heat the Tubing: Use a heat gun or lighter to shrink the tubing, providing insulation and strain relief.
5. Test the Connection (Optional):
- Use a multimeter: Check for continuity between the positive terminal of the capacitor and the positive terminal of the tweeter. You should also check for continuity between the negative terminal of the capacitor and the negative terminal of the tweeter.
Important Notes:
- Polarity: Ensure that you are using a non-polarized capacitor for this application.
- Safety: Always disconnect the power source before working on any electrical components.
- Soldering: Use proper soldering techniques to ensure strong and reliable connections.
- Professional Help: If you are unsure about any part of this process, consult with a qualified audio technician or electronics professional.
By following these steps, you can safely and effectively connect a capacitor to your tweeter, providing protection and improving overall sound quality.
How to Wire Tweeter With Capacitor
1. Gather Your Materials:
- Tweeter: The speaker unit you want to protect.
- Capacitor: The appropriately sized and rated capacitor for your tweeter.
- Soldering Iron and Solder: For creating secure connections.
- Heat Shrink Tubing (optional): To insulate the connections.
- Wire Strippers: To strip the insulation from the wires.
- Multimeter (optional): To test the connections.
2. Prepare the Tweeter:
- Locate the Terminals: Identify the positive (+) and negative (-) terminals on the tweeter. These are usually marked on the tweeter itself.
3. Connect the Capacitor:
- Series Connection:
- Cut a short piece of wire.
- Solder one end of the wire to the positive terminal of the capacitor.
- Solder the other end of the wire to the positive terminal of the tweeter.
- Connect the negative terminal of the capacitor directly to the negative terminal of the tweeter.
Visual Aid:
4. Insulate the Connections (Optional):
- Shrink Tubing: Slide pieces of heat shrink tubing over the soldered connections.
- Heat the Tubing: Use a heat gun or lighter to shrink the tubing, providing insulation and strain relief.
5. Test the Connection (Optional):
- Use a multimeter: Check for continuity between the positive terminal of the capacitor and the positive terminal of the tweeter. You should also check for continuity between the negative terminal of the capacitor and the negative terminal of the tweeter.
Important Notes:
- Polarity: Ensure that you are using a non-polarized capacitor for this application.
- Safety: Always disconnect the power source before working on any electrical components.
- Soldering: Use proper soldering techniques to ensure strong and reliable connections.
- Professional Help: If you are unsure about any part of this process, consult with a qualified audio technician or electronics professional.
By following these steps, you can safely and effectively connect a capacitor to your tweeter, providing protection and improving overall sound quality.
Conclusion
Tweeter capacitors are essential components in high-frequency audio systems, ensuring accurate and efficient sound reproduction. By understanding their function and selecting the appropriate components, audiophiles and engineers can achieve optimal performance from their speakers.
Ready to elevate your audio projects with high-quality tweeter capacitors?
Contact us today to explore our extensive wholesale inventory and discover competitive pricing options. Our team of experts is ready to assist you in finding the perfect capacitor solutions for your specific needs.