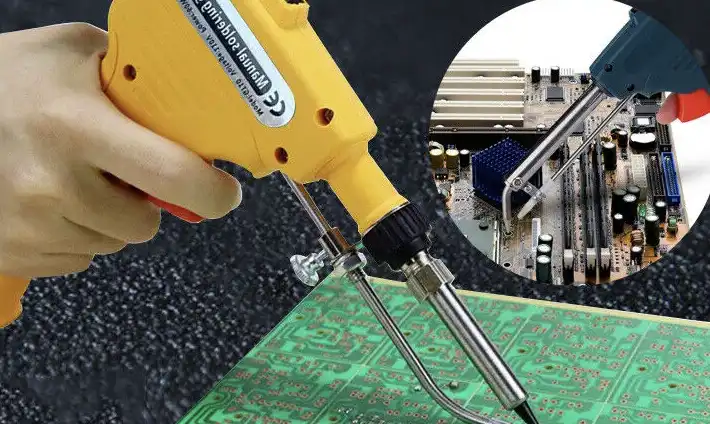
Soldering electronic components is a fundamental skill for anyone interested in electronics, whether you’re a hobbyist or a professional.
This guide will take you through the process step by step, from choosing the right tools to mastering the technique. By the end, you’ll be confident in your ability to create strong and reliable connections for your electronic projects.
What Is Soldering?
Soldering is a process used to join two metal components together using a filler metal called solder.
It’s commonly used in electronics to create connections between various electronic components such as resistors, capacitors, and integrated circuits.
The solder, typically a metal alloy with a low melting point, is heated with a soldering iron until it melts and flows between the components, forming a strong and reliable bond once cooled. Soldering is essential for building electronic circuits, repairing devices, and completing DIY projects involving electronics.
Solder Vs Weld Electronic Components
Below is a comparison table highlighting the differences between soldering and welding electronic components:
| Aspect | Soldering | Welding |
|---|---|---|
| Definition | Joining two or more metal parts using a low-melting-point filler metal (solder). | Joining two or more metal parts by melting and fusing them together. |
| Temperature | Typically operates at lower temperatures, around 200-400°C (392-752°F). | Involves high temperatures, often exceeding 1000°C (1832°F). |
| Process Complexity | Generally simpler and requires less equipment. | Often more complex and may require specialized machinery. |
| Speed | Relatively fast process. | Can be slower due to the need for higher temperatures and cooling times. |
| Material Compatibility | Primarily used for electronic components and small joints. | Typically used for larger metal pieces and structural components. |
| Strength of Joint | Joints may be weaker compared to welding but are suitable for electronic applications. | Welded joints tend to be stronger and more durable. |
| Reversibility | Joints can be desoldered, allowing components to be replaced or repaired. | Welded joints are usually permanent and difficult to reverse. |
| Equipment | Requires a soldering iron, solder wire, flux, and possibly a soldering station. | Requires a welding machine, welding electrodes, and sometimes shielding gas. |
| Health and Safety | Generally safer, although precautions should be taken to avoid exposure to fumes from flux and lead in solder. | Involves exposure to high temperatures, UV radiation, and potentially harmful fumes from welding materials. Proper safety gear is crucial. |
This table provides a basic overview of the key differences between soldering and welding electronic components. Each method has its own advantages and limitations, and the choice between them depends on factors such as the size of the components, desired joint strength, and available equipment.
What’s the Right Soldering Temperature?
The right soldering temperature depends on the type of solder and the components being soldered. Generally, temperatures between 350°C to 400°C (660°F to 750°F) are suitable for most soldering tasks.
However, it’s essential to follow the manufacturer’s recommendations for both the solder and the soldering iron. Using too high a temperature can damage sensitive components or create poor solder joints, while a temperature that’s too low may result in incomplete or weak connections.
Adjustable temperature soldering irons are ideal as they allow you to fine-tune the heat based on the specific requirements of your project.
Tools Required for the Soldering Process
Several tools are required for the soldering process to ensure successful and reliable connections. Here’s a list of essential tools:
- Soldering Iron: The primary tool used to heat the solder and create connections. It comes in various wattages and types, including pencil irons, soldering stations, and temperature-controlled irons.
- Solder: A metal alloy with a low melting point that flows between the components to create a bond. Solder is available in different compositions, including lead-based and lead-free options.
- Flux: A chemical agent used to clean and prepare the surfaces to be soldered. Flux promotes solder flow and helps prevent oxidation, ensuring strong and reliable connections.
- Desoldering Pump or Wick: Essential for removing excess solder or correcting mistakes during the soldering process. The desoldering pump, also known as a solder sucker, creates suction to remove molten solder, while the desoldering wick absorbs excess solder through capillary action.
- Safety Equipment: Including safety glasses to protect your eyes from solder splashes and fumes, and a well-ventilated workspace to prevent inhaling harmful fumes.
- Soldering Stand: A stand or holder to safely store the soldering iron when not in use, preventing accidental burns or damage to surfaces.
- Sponge or Tip Cleaner: Used to clean the tip of the soldering iron, removing excess solder and oxidation to maintain optimal heat transfer and soldering performance.
- Heat Sink: A device used to absorb and dissipate heat away from sensitive components during soldering, preventing damage from excessive heat exposure.
- Magnifying Glass or Third Hand: Optional tools that can aid in precision soldering tasks by providing magnification or holding components in place while soldering.
Understanding Electronic Components
To solder electronic components effectively, it’s crucial to understand the components themselves. Here’s a brief overview:
- Resistors: Components that limit the flow of electric current.
- Capacitors: Devices used to store and release electrical energy.
- Diodes: Semiconductor devices that allow current to flow in one direction only.
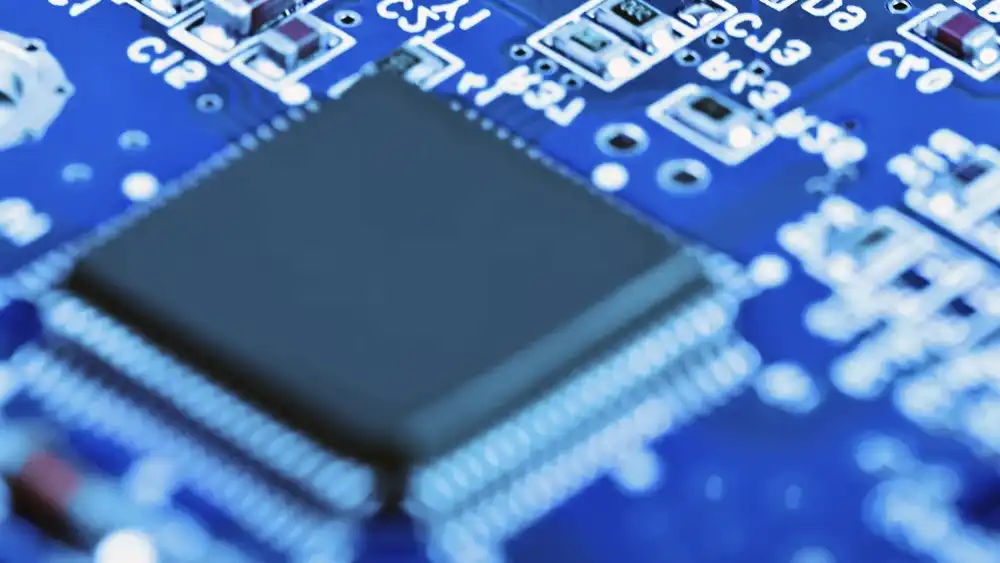
- Integrated Circuits (ICs): Complex assemblies of electronic components on a single chip.
Selecting the Right Soldering Technique
Different projects may require different soldering techniques. Here are some common methods:
- Through-Hole Soldering: Involves inserting component leads through holes in a circuit board and soldering them on the opposite side.
- Surface Mount Soldering: Involves soldering components directly onto the surface of a circuit board without leads.
Step-by-Step Guide: How to Solder Electronic Components

Soldering electronic components is a precise process that requires careful attention to detail.
Follow these step-by-step instructions to solder electronic components like a professional:
- Prepare Your Workspace: Start by setting up a clean, well-lit workspace with adequate ventilation. Clear any clutter and ensure you have enough room to work comfortably.
- Gather Your Materials: Collect all the necessary tools and materials for soldering, including a soldering iron, solder, flux, desoldering pump or wick, safety glasses, and any electronic components you’ll be soldering.
- Heat Up the Soldering Iron: Plug in the soldering iron and allow it to heat up to the appropriate temperature. Most soldering irons have adjustable temperature settings, so refer to the manufacturer’s instructions for the recommended temperature for your specific solder and components.
- Prepare the Components: Trim the leads of the electronic components to the desired length using wire cutters. Then, use a small amount of flux to clean and prepare the soldering points on both the component leads and the circuit board.
- Heat the Joint: Once the soldering iron has reached the correct temperature, place the tip of the iron against the joint where the component lead and circuit board meet. Hold the iron in place for a few seconds to allow the joint to heat up evenly.
- Apply Solder: With the joint heated, touch the tip of the solder to the joint, allowing it to melt and flow evenly around the connection. Be careful not to apply too much solder, as excess solder can create solder bridges or blobby joints.
- Inspect Your Work: After soldering each joint, visually inspect it to ensure a clean and shiny appearance. A properly soldered joint should have a smooth, cone-shaped fillet around the connection point. If the joint appears dull or grainy, it may indicate a cold solder joint that needs to be reheated and resoldered.
- Clean Up: Use a desoldering pump or wick to remove any excess solder or solder bridges from the circuit board. Clean the soldering iron tip with a damp sponge or tip cleaner to remove any built-up flux or oxidation, ensuring optimal performance for future soldering tasks.
Following these steps carefully will help you solder electronic components with precision and reliability, ensuring strong and durable connections for your electronic projects. Practice patience and attention to detail, and soon you’ll be soldering like a pro.
Troubleshooting Common Issues
Even experienced solderers encounter problems from time to time. Here are some common issues and how to address them:
- Cold Joints: Joints that appear dull or grainy may indicate insufficient heat or flux. Reheat the joint and apply fresh solder.
- Solder Bridges: When solder connects two points that shouldn’t be connected, use desoldering braid or a pump to remove the excess solder.
- Component Damage: Excessive heat can damage sensitive components. Use a heat sink or lower the temperature of your soldering iron.
FAQs (Frequently Asked Questions)
How do I choose the right soldering iron?
Consider factors such as wattage, temperature control, and tip compatibility based on your specific needs and projects.
What type of solder should I use?
Lead-free solder is becoming increasingly common due to environmental concerns, but lead-based solder is still widely used and may be easier for beginners to work with.
How do I prevent solder from sticking to my iron?
Keep the tip of your soldering iron clean by regularly wiping it on a damp sponge or using a tip tinner.
Can I solder without a flux?
While flux is recommended for clean and reliable connections, some solder wire contains a flux core that can suffice for basic soldering tasks.
How do I know when the soldering iron is ready to use?
Many soldering irons have indicator lights or temperature settings that signal when they’ve reached the desired temperature.
What safety precautions should I take when soldering?
Always wear safety glasses to protect your eyes from solder splashes and work in a well-ventilated area to avoid inhaling fumes.
Conclusion
Mastering the art of soldering electronic components opens up a world of possibilities for DIY projects and repairs. With the right tools, techniques, and practice, you can confidently tackle any soldering task with precision and skill.