Capacitors are vital in modern electronics, found in devices from smartphones to electric cars. Surprisingly simple to construct, capacitors make a great project for hobbyists and budding engineers.
This article provides a step-by-step guide on how to make a capacitor using common materials. By understanding the principles of capacitance and its components, readers can learn how capacitors work and customize them for various applications.
What Is A Capacitor?
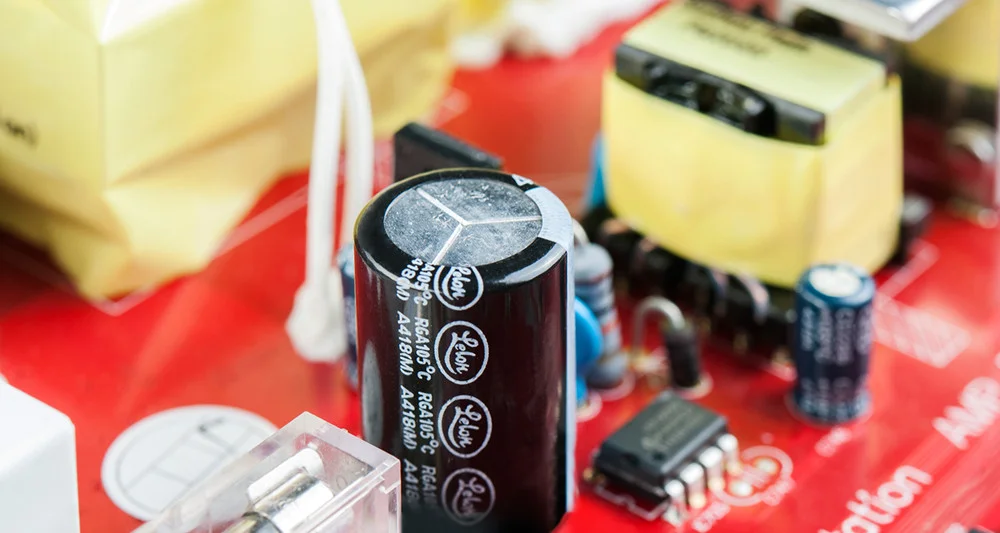
A capacitor is an electrical component that stores and releases energy in the form of an electric charge. It consists of two conductive plates separated by an insulating material called a dielectric. When a voltage is applied across the plates, an electric field is created in the dielectric, causing an accumulation of electric charges on the plates. This process allows the capacitor to store energy, which can be released when needed.
Components Of A Capacitor
A capacitor consists of several key components, each serving a specific purpose in its function:
Conductive Plates:
Capacitor’s plates store charge. When voltage is applied, they accumulate opposite charges, creating an electric field. Aluminum foil or copper sheets are commonly used. Larger areas and closer proximity enhance capacitance.
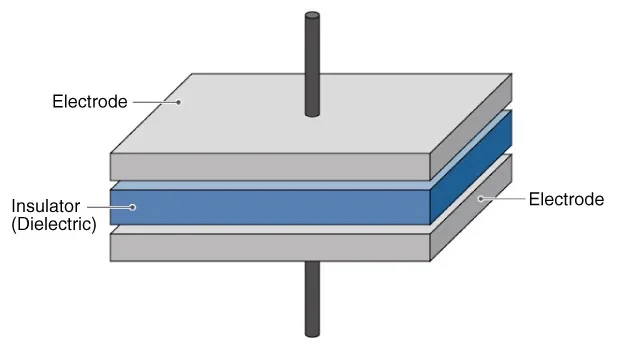
Dielectric Material:
Dielectric insulates plates and boosts charge storage. It separates plates, reducing electric field strength. Paper, plastic films, ceramic, or air are commonly used. The choice affects capacitance and performance.
Terminals:
Capacitor terminals are connection points facilitating integration into circuits. Typically metallic, they enable charge transfer.
Encapsulation:
Capacitor encapsulation shields internal components from moisture, dust, and damage, ensuring reliability. Materials like plastic, ceramic, or metal provide durability and insulation, maintaining performance and preventing premature failure.
Electrolyte (for Electrolytic Capacitors):
Electrolyte, found in electrolytic capacitors, is a conductive liquid or gel substance. It serves a vital role in the capacitor’s operation by facilitating the flow of electric current. This electrolyte fills the space between the capacitor’s conductive plates and interacts with the oxide layer on one of the plates, typically the anode.
By selecting the appropriate materials and ensuring proper assembly, the conductive plates effectively facilitate the storage and release of electrical energy in a capacitor.
Materials Needed To Make A Capacitor
Aluminum Foil

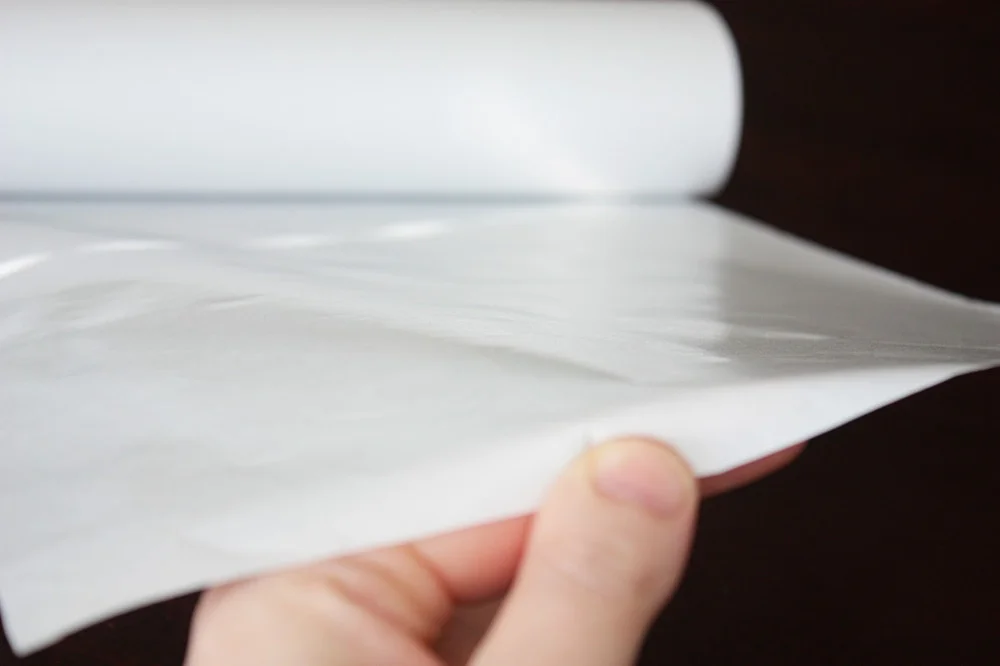
Wax Paper Or Freezer Paper
Scissors
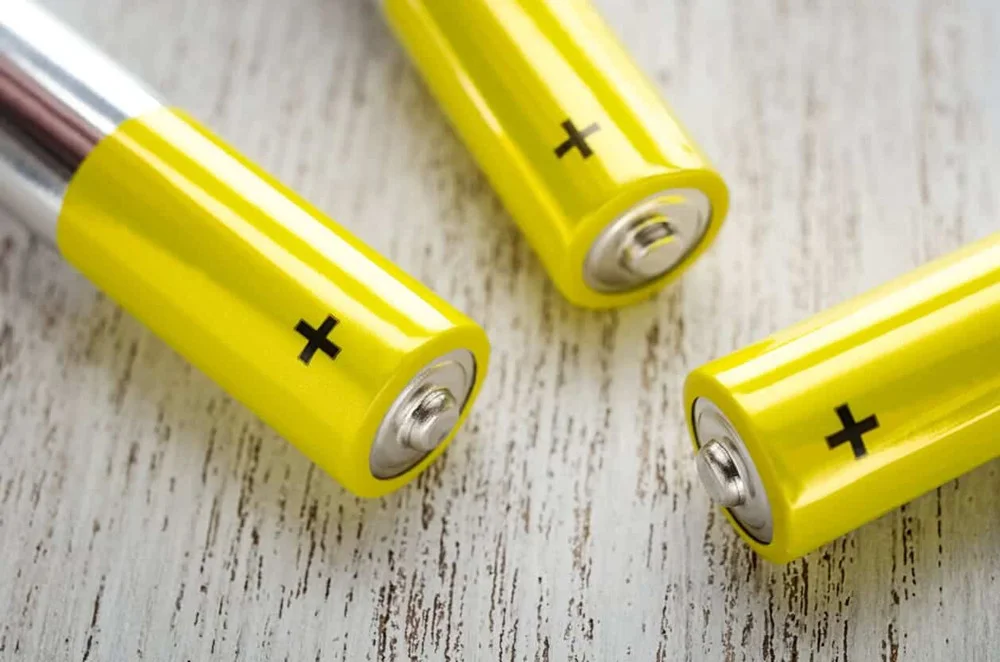
2 – AA Batteries
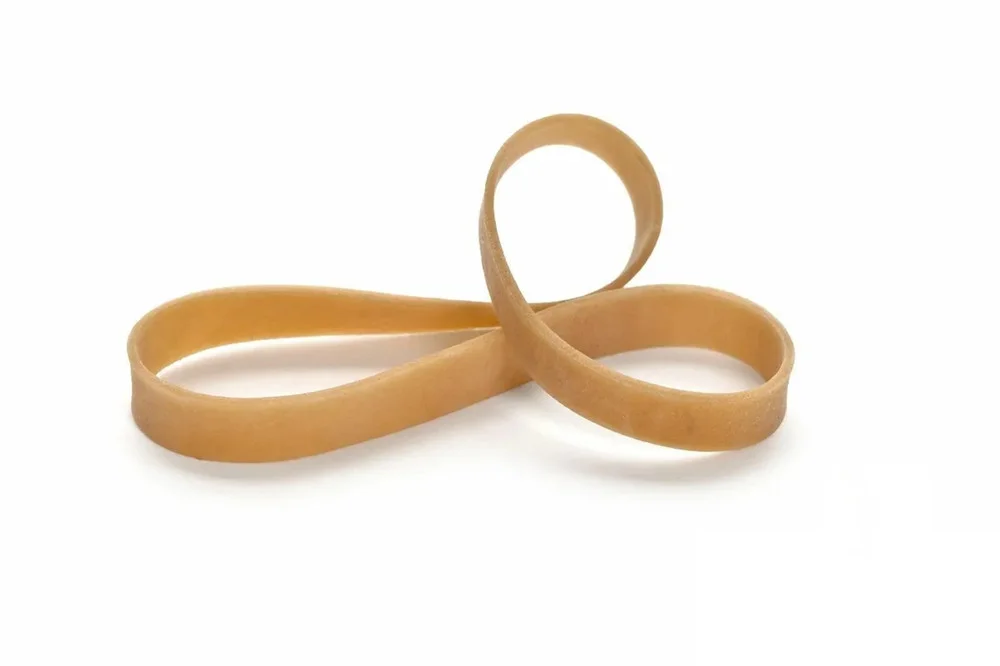
Thick Rubber Band
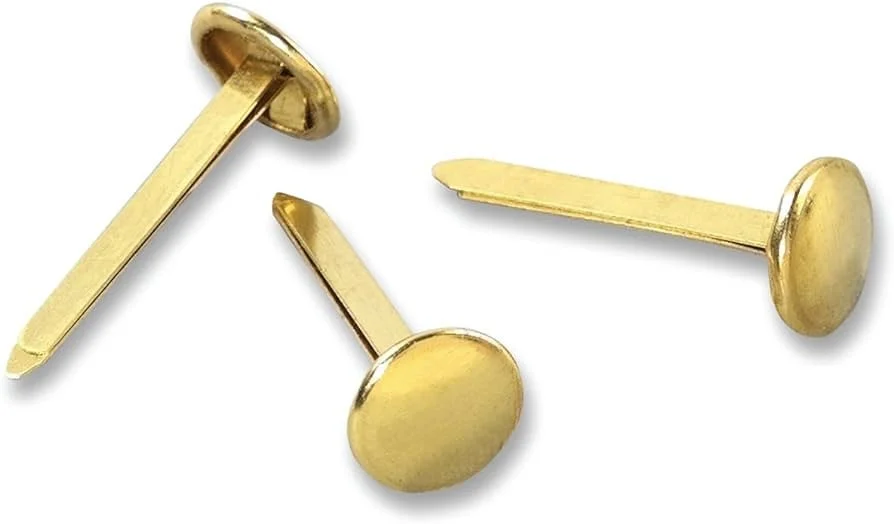
2 – Office Fasteners
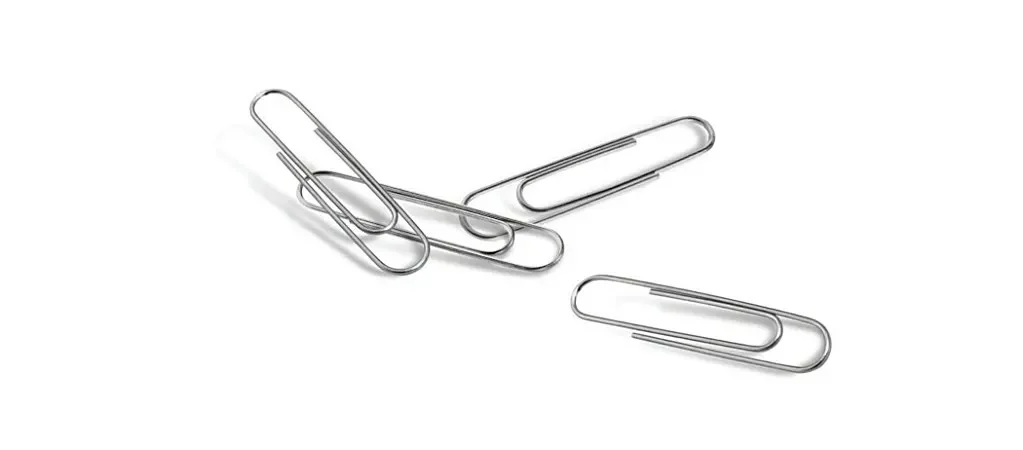
2 – Paper Clips
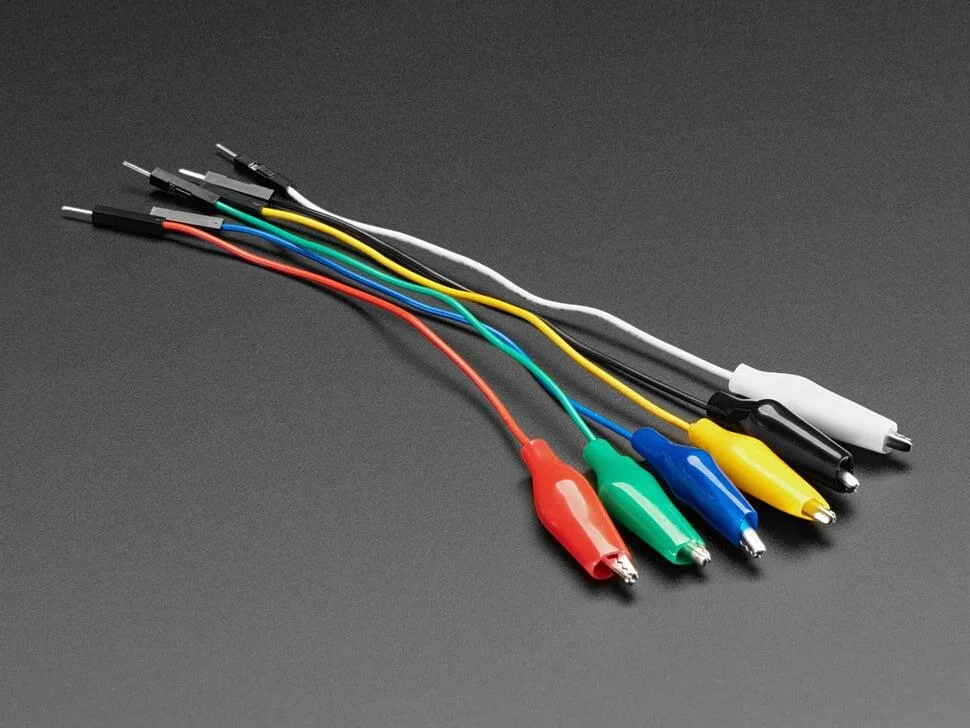
2* Wires With Aligator Clips
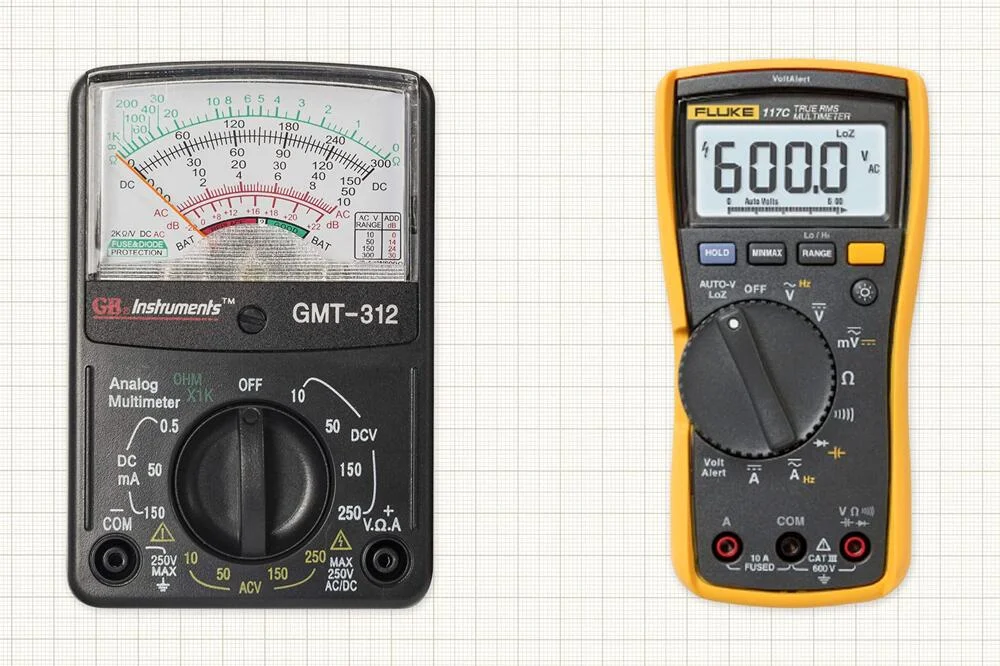
Multimeter
How To Make A Capacitor Steps
Step 1 Constructing A Basic Capacitor With Aluminum Foil And Wax Paper
In this experiment, we’re setting up a simple capacitor using aluminum foil and wax paper. A capacitor is a device that stores electrical energy in an electric field. It typically consists of two conductive plates separated by a non-conductive material called a dielectric.
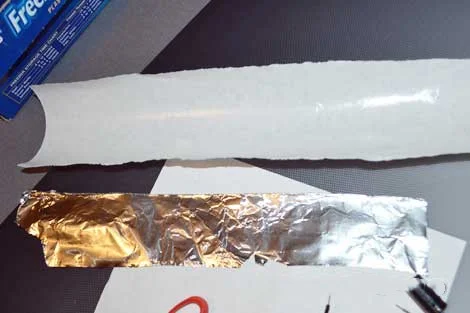
Step 2 Processing Aluminum Foil and Wax Paper
In the first step, two squares are cut from the aluminum foil strip. Following this, the wax paper is trimmed to extend about 1/4 to 1/2 inch beyond the aluminum foil on the top and bottom edges. Finally, the wax paper strip is cut to a length slightly more than four times the width of one of the aluminum foil squares.

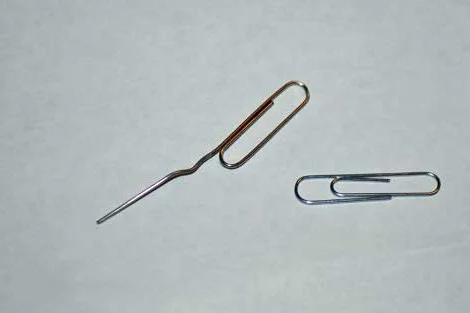
Step 3 Straighten One End Of Each Of The Two Paper Clips By Bending Them.
Choose two paper clips for this step. Ensure they are sturdy enough to be manipulated without breaking. Take one paper clip and grasp one end firmly with a pair of pliers or your fingers. Apply gentle pressure and gradually bend the end of the paper clip until it forms a straight line. You may need to adjust the angle several times to achieve the desired result.
Repeat the same process for the second paper clip, ensuring that you straighten one end in a similar manner. By straightening one end of each paper clip, you’re preparing them to serve as conductive leads or connections in the experiment or project you’re working on.
Step 4 Mounting Aluminum Foil Square And Paperclip Connection On Wax Paper
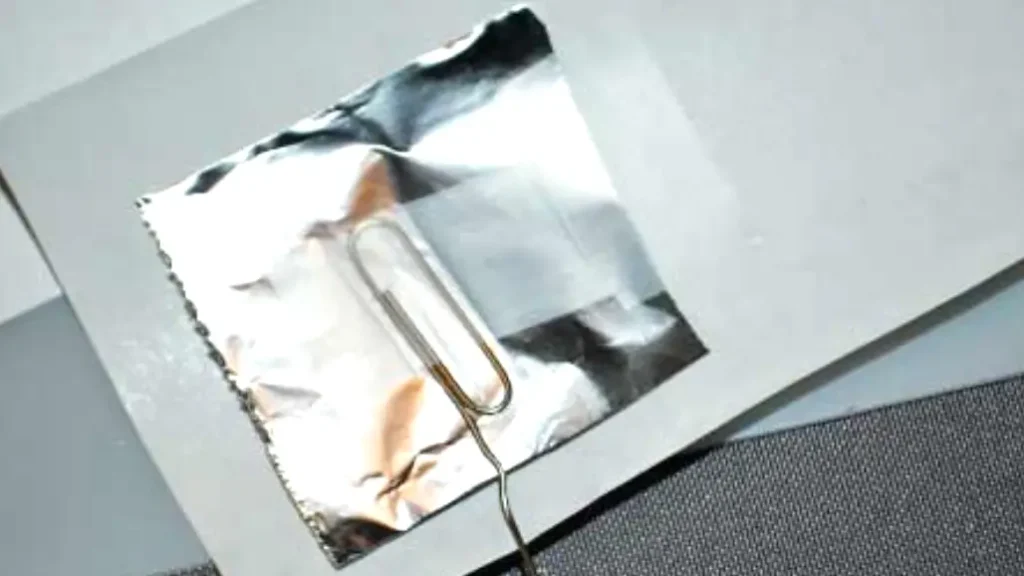
Position one of the aluminum foil squares close to the edge of the wax paper. Secure it in place with a small piece of tape on top. Then, attach the curved end of one paperclip to the center of the aluminum foil square using tape. Ensure the straight part extends beyond the wax paper’s edge. (Make sure the straight piece of paperclip sticks out away from the edge of the wax paper.)
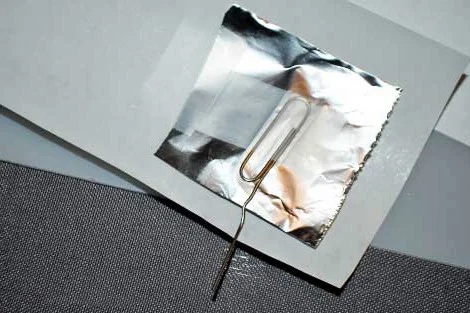
Step 5 Fold The Wax Paper Over The Aluminum Foil Square
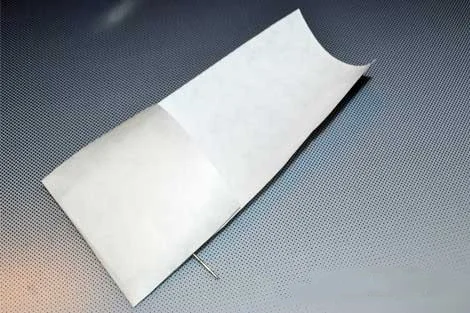
Begin by ensuring that the aluminum foil square is placed centrally on the wax paper strip. The aluminum foil square should be completely covered by the wax paper strip. Gently fold the wax paper strip over the aluminum foil square.
The goal is to cover the aluminum foil completely on both sides with the dielectric material, ensuring that there is no direct contact between the aluminum foil and any external objects or surfaces. Once the wax paper is folded over the aluminum foil, you can use tape or adhesive to secure the edges of the wax paper together. This will hold the assembly in place and prevent the aluminum foil from shifting or coming into contact with anything it shouldn’t.
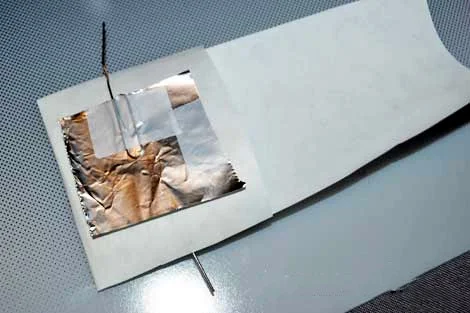
Step 6 Aligning and Securing Second Aluminum Foil Square with Paperclip Connection
Position the second aluminum foil square directly over the same spot as the first one. Secure it with a small piece of tape on top. Then, attach the curved end of the remaining paperclip to the center of the second aluminum foil square using tape. Ensure the straight part extends beyond the wax paper’s edge in the opposite direction of the first paperclip.
Make sure the straight end of the paperclip extends beyond the edge of the wax paper in the opposite direction from Step.
Step 7 Repeating The Assembly Process For The Second Aluminum Foil Square
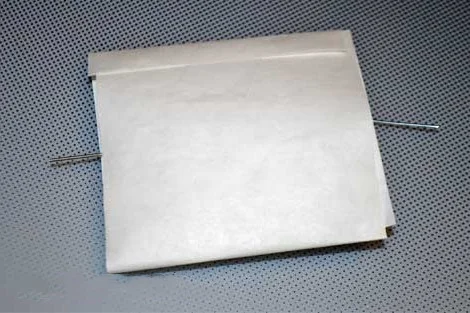
After positioning the second aluminum foil square directly over the same spot as the first one, there will likely be some excess length of wax paper extending beyond the second aluminum foil square.
Gently fold the remaining length of wax paper over the second aluminum foil square. The objective is to completely cover the second aluminum foil square with the dielectric material (wax paper) just like you did with the first one.
Ensure that the entire surface area of the second aluminum foil square is covered by the wax paper. This step is crucial to prevent any direct contact between the aluminum foil and external objects or surfaces, maintaining the integrity of the capacitor. As an additional step, you can choose to roll up the assembly to resemble a commercial capacitor.
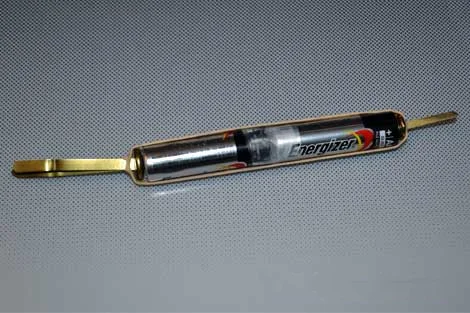
Step 8 Constructing a 3-Volt Power Supply with Rubber Band and Batteries
To create a 3-volt power supply, insert two office fasteners through opposite ends of a thick rubber band. Then, wrap the rubber band around both batteries, positioned end-to-end as depicted in the photo below. Finally, use a small piece of tape between the batteries to assist in securing them together.
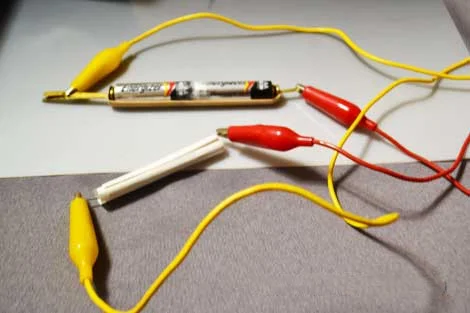
Step 9 Linking Battery Supply To Capacitor With Alligator Clips
Connect an alligator clip to one end of the battery supply, then attach the other end to one of the paper clips protruding from the capacitor. Repeat this process with another alligator clip on the opposite end of the battery holder and the remaining paper clip.
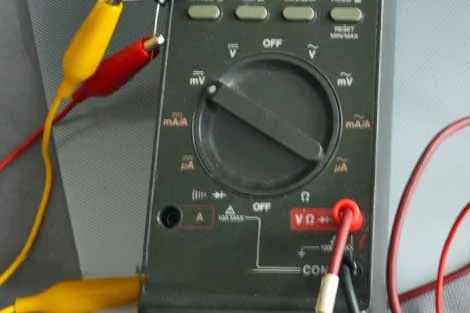
Step 10 Setting Up Multimeter For DC Voltage Measurement
Adjust the multimeter to measure DC voltage and set the dial to microvolts. If the multimeter features auto-ranging, skip this step. Ensure the probes are correctly placed in the negative (com) and positive (reading/V) ports to measure DC voltage accurately.
Step 11 Detach The Alligator Clips From The Battery Holder Ends
First, remove the alligator clips from the terminals or ends of the battery holder. This action effectively interrupts the flow of electricity from the battery to the circuit, ensuring safety during subsequent steps.
Once the alligator clips are detached from the battery holder ends, you’ll connect them to the ends of the multimeter probes. The multimeter probes typically consist of a black (negative) probe and a red (positive) probe.
It’s crucial to ensure a secure connection between the alligator clips and the multimeter probes. This ensures accurate and reliable measurements when using the multimeter to test the capacitor’s voltage.
Make sure to maintain proper polarity when connecting the alligator clips to the multimeter probes. The red (positive) clip should be connected to the positive (+) probe of the multimeter, while the black (negative) clip should be connected to the negative (COM) probe.
Step 12: Repeat Steps
Repeat Steps 9 through 11 with a standard capacitor.
In this experiment, our capacitor resembles an aluminum electrolytic capacitor, but instead of borax paste, we employ a sheet of wax paper as the dielectric. The capacitor utilizes two aluminum foil squares to accumulate positive and negative charges. Its charge is directly linked to the voltage across it, determining its value. Capacitors are measured in farads, named after Michael Faraday.
Various factors influence a capacitor’s performance. The size, including thickness, of the conductive plates matters, as does their material. The dielectric material, such as wax paper in our experiment, also affects capacitance. How did your experiment go? If you encounter difficulty reading voltage values, ensure all metal parts are securely connected.
This includes wires touching the aluminum foil squares, as well as connections to the multimeter and battery. Initially, the voltage should be highest, then drop to zero. Remember, commercial-quality capacitors offer greater stability and consistency than homemade ones.
How to Build a Capacitor With Aluminum Foil
This guide outlines the steps to build a rudimentary capacitor using readily available materials like aluminum foil and paper. While this experiment will have a very low capacitance and is primarily for educational purposes, it demonstrates the fundamental principles of capacitor construction.
Capacitors store electrical energy by separating electric charge on two conductive plates separated by an insulating material (dielectric). This simple experiment allows you to observe this principle in action, though the resulting capacitor will have limited practical use.
Materials:
- Two sheets of aluminum foil
- Two sheets of paper (wax paper works well)
- Tape
- Two alligator clips
- A 9-volt battery
- A multimeter (optional)
Instructions:
Prepare the Sheets:
- Cut two equal-sized squares or rectangles from the aluminum foil.
- Place one sheet of aluminum foil on top of a sheet of paper.
- Carefully place the second sheet of paper on top of the first sheet of aluminum foil.
- Place the second sheet of aluminum foil on top of the second sheet of paper.
Create a Stack:
Repeat step 1 to create multiple layers. More layers generally increase capacitance, but this experiment will likely have limited effect with a small number of layers.
Attach Leads:
- Attach an alligator clip to one corner of the topmost aluminum foil sheet.
- Attach another alligator clip to one corner of the bottommost aluminum foil sheet.
Test Capacitors (Optional):
- Connect to a Battery: Connect the alligator clips to the positive and negative terminals of the 9-volt battery.
- Disconnect from the Battery: Quickly disconnect the alligator clips from the battery.
- Measure Voltage (Optional): If you have a multimeter, you can briefly connect the probes to the alligator clips to measure a small voltage. This indicates that the capacitor has stored a small amount of charge.
Important Notes:
- Safety: Be cautious when handling batteries.
- Low Capacitance: This method creates a very basic capacitor with low capacitance.
- Educational Purpose: This experiment is primarily for educational purposes to demonstrate the basic principles of a capacitor.
How Does Capacitor Work?
A capacitor consists of two metal components separated by an insulating material, forming two terminals. When a battery is connected to the capacitor, electrons move to the metal parts. Subsequently, when a device like a flashlight is connected, electrons are discharged, enabling electric flow.
Similarly, in our capacitor, the container serves as the insulator, while paper clips and aluminum foil act as terminals. Thus, our capacitor operates akin to a genuine capacitor, albeit possibly less efficiently.
What Makes Capacitor Stronger?
To enhance its strength, consider using a larger container and additional aluminum foil. Instead of paper clips, opt for steel bolts or nails. Alternatively, employ your creativity and scientific knowledge to reinforce it further.
How To Improve A Simple Homemade Capacitor?
Quality Materials: Use high-grade materials for the conductive plates and dielectric, such as thicker aluminum foil or copper sheets, and high-quality dielectric materials like polypropylene or ceramic.
Increase Plate Surface Area: Enlarge the size of the conductive plates or use multiple layers of foil to increase surface area, enhancing capacitance.
Optimize Dielectric Properties: Experiment with different dielectric materials to find one with higher permittivity or lower leakage current, such as specialized capacitor papers or plastics.
Ensure Proper Assembly: Securely separate the plates with the dielectric material, ensuring no air gaps or overlaps, and tightly connect all components to prevent leakage.
Enhance Electrical Contacts: Ensure good electrical contact between the capacitor and the circuit by using clean, tightly secured connections to minimize resistance.
Minimize External Interference: Shield the capacitor from external electromagnetic interference by enclosing it in a metal or conductive casing or placing it away from sources of interference.
Temperature Stability: Choose materials that maintain stable capacitance over a wide temperature range, or add temperature-compensating components to the circuit.
Temperature Stability: Choose materials that maintain stable capacitance over a wide temperature range, or add temperature-compensating components to the circuit.
By implementing these improvements, the performance and reliability of a homemade capacitor can be optimized for various electronic applications.
Conclusion
In conclusion, mastering capacitor construction offers vast possibilities for electronics enthusiasts and engineers. Crafting capacitors provides insights into capacitance principles, fostering circuitry skills and innovation. Understanding the creation process empowers experimentation in electronics, fostering creativity and professional growth. Capacitor crafting forms a foundation for future electronic exploration and discovery, accessible to all with curiosity and determination.