Electronic devices have become an integral part of our daily lives, from smartphones to home appliances and industrial machinery.
However, like any other machinery, electronic components can encounter issues over time, leading to malfunctioning or failure. Troubleshooting electronic components is essential for diagnosing and resolving these issues effectively.
In this article, we will explore the process of troubleshooting electronic components, common issues encountered, tools required, steps involved, and tips for effective troubleshooting.
What is Troubleshooting Electronic Components?
Troubleshooting electronic components involves identifying and fixing problems with the inner workings of electronic devices. It’s like being a detective, but instead of solving crimes, you’re solving technical mysteries.
Common Issues with Electronic Components
Common issues with electronic components can vary depending on the type of device and its usage.
Here’s a more detailed explanation of some of the most prevalent issues:
- Overheating: Electronic components generate heat during operation, and excessive heat can lead to thermal stress and component degradation. Overheating can occur due to inadequate cooling systems, improper ventilation, or prolonged use at high loads. Components such as CPUs, GPUs, and power transistors are particularly susceptible to overheating.
- Power Supply Problems: Issues with the power supply can cause various problems in electronic devices. This includes voltage fluctuations, insufficient power delivery, or complete power failure. Common causes of power supply problems include faulty cables or connectors, damaged power adapters, or problems with the electrical outlet itself.
- Connection Issues: Loose or faulty connections can disrupt the flow of electrical signals within a device, leading to malfunctions or intermittent failures. Connection issues can occur due to corroded contacts, loose wires, or poor solder joints. These issues can affect various components, including connectors, cables, and circuit board traces.
- Component Failure: Electronic components can fail for various reasons, including manufacturing defects, environmental factors, or aging. Component failure can manifest as sudden malfunctions, performance degradation, or complete device failure. Commonly affected components include capacitors, resistors, diodes, transistors, and integrated circuits.
- Environmental Factors: Environmental conditions such as temperature extremes, humidity, dust, and vibrations can affect the performance and reliability of electronic components. Exposure to harsh environments can accelerate component degradation and increase the likelihood of failures. For example, electronic devices used in industrial or outdoor settings may be more prone to environmental damage.
- Electromagnetic Interference (EMI): EMI can disrupt the operation of electronic devices by introducing unwanted electrical signals into the circuitry. Sources of EMI include nearby electronic devices, power lines, radio frequency interference (RFI), and electromagnetic fields. Shielding components and proper grounding techniques are essential for minimizing the effects of EMI on electronic systems.
By understanding these common issues with electronic components, you can better diagnose and address problems when troubleshooting electronic devices. It’s essential to systematically identify the root cause of the issue and implement appropriate solutions to ensure the proper functioning of electronic devices.
Tools Required for Troubleshooting Electronic Components
When it comes to troubleshooting electronic components, having the right tools is essential to diagnose and fix issues effectively.
Here are some of the tools you’ll need in your toolkit:
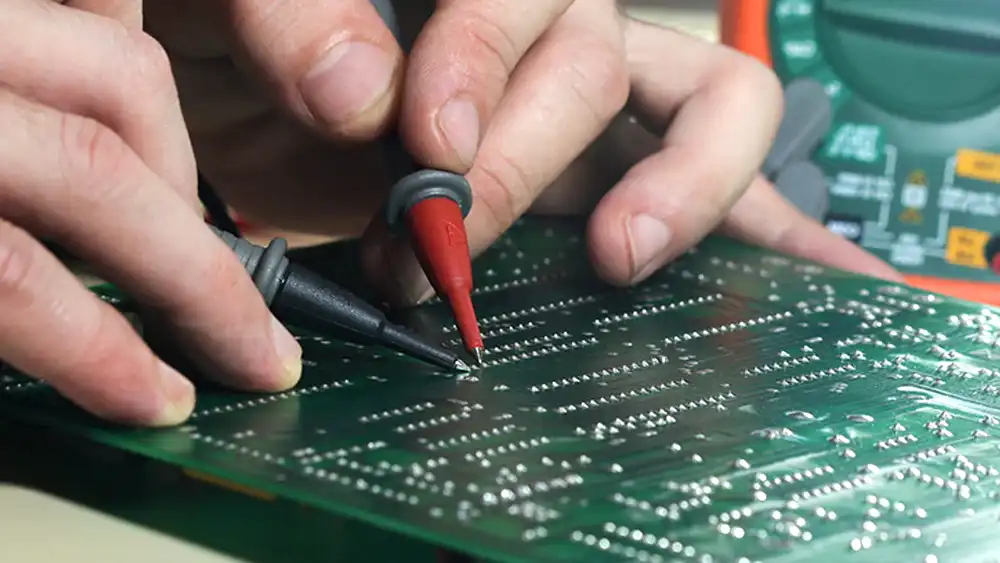
- Multimeter: A multimeter is a versatile tool used to measure voltage, current, and resistance in electronic circuits. It’s indispensable for testing the continuity of circuits, checking component values, and diagnosing electrical problems.
- Oscilloscope: An oscilloscope is used to visualize and analyze electrical signals in the time domain. It’s particularly useful for examining waveforms, detecting signal abnormalities, and troubleshooting analog and digital circuits.
- Logic Analyzer: A logic analyzer is a specialized tool used to capture and analyze digital signals in electronic circuits. It helps in debugging digital systems, detecting timing violations, and troubleshooting communication protocols.
- Soldering Iron: A soldering iron is used to solder and desolder electronic components onto circuit boards. It’s essential for making repairs, replacing faulty components, and assembling electronic projects.
- Desoldering Pump: A desoldering pump, also known as a solder sucker, is used to remove soldered components from circuit boards. It’s handy for replacing defective parts or correcting soldering mistakes during troubleshooting.
Having these tools at your disposal will enable you to perform comprehensive diagnostics and repairs when troubleshooting electronic components. Whether you’re a hobbyist, technician, or engineer, investing in quality tools will streamline the troubleshooting process and enhance your ability to resolve technical issues effectively.
Steps for Troubleshooting Electronic Components
When troubleshooting electronic components, following a systematic approach is crucial to identify and resolve issues efficiently.
Here are the essential steps to troubleshoot electronic components effectively:
Visual Inspection:
Start by visually inspecting the electronic components and circuitry for any signs of damage, such as burnt components, loose connections, or physical defects. Check for obvious issues like disconnected wires or bulging capacitors.
Power Supply Testing:
Verify that the power supply to the electronic device is functioning correctly. Use a multimeter to measure the voltage output from the power source and ensure it meets the required specifications. Check for loose connections or damaged power cables that may affect power delivery.
Connection Checks:
Examine all connections between components, circuit boards, and external peripherals. Ensure that cables and connectors are securely plugged in and free from damage or corrosion. Wiggle connections gently to detect any intermittent faults that may occur due to loose connections.
Individual Component Testing:
Use appropriate testing methods to evaluate the functionality of individual electronic components. For resistors, capacitors, and diodes, use a multimeter to measure resistance, capacitance, and forward voltage drop, respectively. Test transistors and integrated circuits using specialized testing equipment or datasheet specifications.
Isolation of the Problem:
Narrow down the possible causes of the issue by systematically isolating components or sections of the circuit. Disconnect or bypass suspected faulty components and observe if the problem persists. This process helps identify the specific component or circuit section responsible for the malfunction.
Signal Tracing:
Trace the path of signals through the circuit using an oscilloscope or logic analyzer. Identify points where signals deviate from expected behavior or encounter abnormalities. This technique helps pinpoint the location of faults within the circuitry and facilitates targeted troubleshooting efforts.
Component Substitution:
Substitute suspected faulty components with known-good ones to verify their functionality. Replace components one at a time and observe if the issue is resolved after each substitution. This method helps confirm the diagnosis and ensures that the correct component is identified for replacement.
Firmware Analysis (if applicable):
If the electronic device incorporates firmware or software, analyze its programming code for errors or bugs. Update firmware to the latest version or reflash the software if necessary to address software-related issues affecting the device’s operation.
Following these steps for troubleshooting electronic components systematically, you can identify and resolve issues effectively, restoring the functionality of electronic devices and systems. Remember to document your findings and actions taken during the troubleshooting process for future reference and troubleshooting efforts.

Methods of Troubleshooting Electronic Components

When troubleshooting electronic components, there are several methods that technicians and engineers employ to identify and resolve issues effectively. Here are some common methods of troubleshooting electronic components:
- Visual Inspection: Visual inspection is the first step in troubleshooting electronic components. Technicians visually examine the components and circuitry for any physical damage, loose connections, or signs of overheating. Visual inspection can often reveal obvious problems that can be easily addressed.
- Testing with Multimeter: A multimeter is a versatile tool used to measure voltage, current, and resistance in electronic circuits. Technicians use a multimeter to test the continuity of circuits, check component values, and diagnose electrical problems. By measuring voltage drops across components and testing for continuity, technicians can identify faulty components or connections.
- Oscilloscope Analysis: An oscilloscope is a tool used to visualize and analyze electrical signals in the time domain. Technicians use an oscilloscope to observe waveforms, detect signal abnormalities, and troubleshoot analog and digital circuits. By examining signals at different points in the circuit, technicians can pinpoint areas of concern and diagnose issues such as signal distortion or noise interference.
- Logic Probe Testing: A logic probe is a handheld tool used to test digital circuits and logic levels. Technicians use a logic probe to determine whether digital signals are present and to identify logic high (1) and logic low (0) states. By probing different points in the circuit and comparing the observed logic levels to expected values, technicians can diagnose logic-related issues such as stuck-at faults or signal propagation delays.
- Component Substitution: Component substitution involves replacing suspect components with known-good ones to isolate faulty components and confirm their role in causing the problem. Technicians systematically swap out components one at a time and test the system after each substitution to identify which component is causing the issue. Component substitution is particularly useful for diagnosing intermittent faults or issues with specific components.
- Functional Testing: Functional testing involves testing the overall functionality of the electronic device or system to identify any issues with its operation. Technicians perform functional tests to verify that the device performs its intended function correctly and to identify any deviations from expected behavior. Functional testing may involve running diagnostic software, performing simulated tests, or conducting real-world tests under typical operating conditions.
- Software Analysis: For devices with embedded software or firmware, software analysis may be necessary to diagnose issues related to software bugs, errors, or configuration settings. Technicians use debugging tools, software analyzers, and diagnostic software to analyze the software code and identify potential issues. By examining error logs, system logs, and diagnostic outputs, technicians can pinpoint software-related problems and develop solutions to address them.
By employing these methods of troubleshooting electronic components, technicians and engineers can systematically diagnose and resolve issues to ensure the proper functioning of electronic devices and systems. Each method has its strengths and limitations, and technicians may need to use a combination of techniques to effectively troubleshoot complex electronic problems.
Advanced Troubleshooting Techniques
Advanced troubleshooting techniques go beyond basic diagnostic methods to address complex issues and challenging problems in electronic systems. These techniques require a deeper understanding of electronic principles and sophisticated tools to analyze and rectify problems effectively.
Here are some advanced troubleshooting techniques commonly used in the field:
- Signal Tracing: Signal tracing involves tracing the path of an electrical signal through a circuit to identify points of failure or signal degradation. By following the signal path with an oscilloscope or logic analyzer, technicians can pinpoint where the signal is being lost or distorted, allowing them to focus their troubleshooting efforts on specific components or sections of the circuit.
- Reverse Engineering: Reverse engineering involves deconstructing and analyzing the design and operation of a circuit or system to understand its functionality and identify potential issues. This technique is particularly useful when dealing with proprietary or undocumented systems, as it allows technicians to gain insights into how the system operates and uncover any hidden problems or vulnerabilities.
- Component Substitution: Component substitution involves replacing suspect components with known-good ones to isolate faulty components and confirm their role in causing the problem. By systematically swapping out components one at a time and testing the system after each substitution, technicians can identify which component is causing the issue and take appropriate action to repair or replace it.
- Firmware Analysis: Firmware analysis involves examining the software code running on embedded systems to identify bugs, errors, or vulnerabilities that may be causing problems. This technique requires specialized tools and knowledge of programming languages such as C or assembly language. By analyzing the firmware code and identifying potential issues, technicians can develop patches or updates to address software-related problems and improve system performance and reliability.
- Advanced Testing Equipment: Advanced testing equipment, such as spectrum analyzers, network analyzers, and thermal imaging cameras, can provide valuable insights into the performance and condition of electronic systems. These tools allow technicians to measure and analyze various parameters, including signal frequency, impedance, and temperature, to diagnose complex issues and troubleshoot problems more effectively.
- Simulation and Modeling: Simulation and modeling software allow technicians to simulate the behavior of electronic circuits and systems under different operating conditions. By creating virtual models of the system and running simulations, technicians can predict how changes to the system will affect its performance and identify potential issues before they occur in the real world. This proactive approach to troubleshooting can help minimize downtime and prevent costly failures.
By employing these advanced troubleshooting techniques, technicians can tackle even the most challenging electronic problems with confidence and precision, ensuring the reliability and performance of electronic systems in a wide range of applications.
Tips for Effective Troubleshooting
Effective troubleshooting requires patience, attention to detail, and systematic approach. Keep records of your troubleshooting process, including observations, test results, and actions taken. Take breaks if you’re feeling frustrated or overwhelmed, as fresh eyes can often spot overlooked issues. Seek help from online forums, communities, or colleagues if you’re stuck on a particularly challenging problem.
Conclusion
Troubleshooting electronic components is a critical skill for electronics enthusiasts, technicians, and engineers. By understanding common issues, using the right tools, following systematic steps, and applying advanced techniques when necessary, you can diagnose and resolve electronic problems effectively. Remember to approach troubleshooting with patience, persistence, and a willingness to learn from each troubleshooting experience.
FAQs
- What are the most common issues with electronic components?
- Overheating, power supply problems, connection issues, and component failure are among the most common issues encountered.
- What tools are essential for troubleshooting electronic components?
- Essential tools include a multimeter, oscilloscope, logic analyzer, soldering iron, and desoldering pump.
- How do you troubleshoot specific components like resistors and capacitors?
- Troubleshooting specific components involves measuring relevant parameters such as resistance for resistors and capacitance for capacitors using appropriate testing methods.
- What are some advanced troubleshooting techniques?
- Advanced techniques include signal tracing, reverse engineering, component substitution, and firmware analysis.
- What tips can help improve the effectiveness of troubleshooting?
- Keeping records, taking breaks, and seeking help from online communities are some tips for effective troubleshooting.