Testing capacitors with a multimeter is a fundamental skill in electronics maintenance and repair. Capacitors, vital components in electronic circuits, store and release electrical energy. However, like any electronic component, they can degrade over time or become faulty due to various factors such as age, heat, or overvoltage.
In this guide, we will explore the process of testing capacitors using a multimeter, a versatile tool found in every electronics enthusiast’s toolkit.
Whether you’re a hobbyist tinkering with electronics at home or a professional technician diagnosing complex circuit issues, understanding how to effectively test capacitors is essential.
We’ll provide step-by-step instructions, practical tips, and insights to ensure accurate testing and troubleshooting, empowering you to maintain and repair electronic devices with confidence. So, let’s dive in and master the art of testing capacitors with a multimeter.
What is a Capacitor
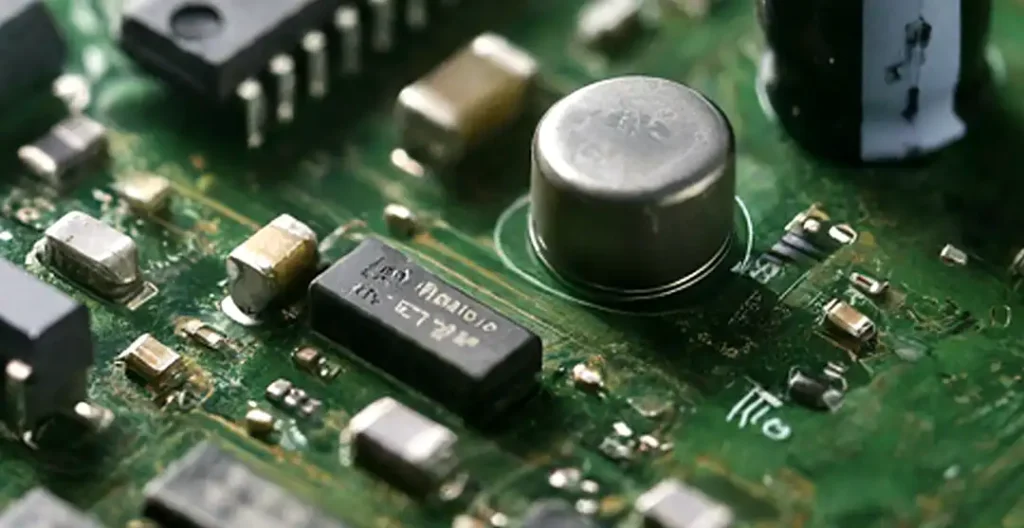
A capacitor is an electronic component that stores and releases electrical energy. It consists of two conductive plates separated by a dielectric material. When a voltage is applied across the plates, charge accumulates, creating an electric field.
This accumulation of charge allows capacitors to temporarily store electrical energy. Capacitors come in various types, sizes, and capacitance values, making them versatile components used in a wide range of electronic circuits and devices.
What Is a Multimeter
A multimeter serves as a flexible tool utilized for gauging voltage, current, resistance, and conducting additional assessments such as continuity and temperature readings in electrical circuits.
These measurements find application across diverse scenarios, including the evaluation of capacitors for potential faults. Employing a multimeter in various methods enables the detection of malfunctioning capacitors, facilitating the identification and resolution of errors within electronic circuits. Refer to the comprehensive guide below for detailed instructions on testing capacitors using a multimeter.
Capacitor Testing Basics
Testing capacitors with a multimeter is a fundamental skill for anyone working with electronic circuits. Multimeters are versatile tools capable of measuring various electrical properties, including capacitance. Whether you’re diagnosing faulty components or verifying circuit performance, understanding how to test capacitors accurately is essential. In this section, we’ll explore the basics of capacitor testing with a multimeter, covering different methods and considerations.
Introduction to Capacitor Testing
- Capacitors are electronic components that store and release electrical energy.
- Testing capacitors helps ensure their proper functioning and identifies faulty components.
- Multimeters are commonly used for capacitor testing due to their ability to measure capacitance.
Using a Multimeter for Capacitor Testing
Testing capacitors with a multimeter is a crucial skill for electronics enthusiasts and professionals alike. Multimeters, with their versatile capabilities, serve as indispensable tools for diagnosing and troubleshooting electronic circuits. Here, we’ll explore the steps to effectively use a multimeter for capacitor testing, ensuring accurate measurements and reliable results.
1. Preparation: Before proceeding with capacitor testing, it’s essential to take certain precautions to ensure safety and accurate readings:
- Ensure the multimeter is set to the capacitance (C) mode.
- Discharge the capacitor to remove any stored charge, reducing the risk of electrical shock.
- Verify that the multimeter probes are in good condition and properly connected.
2. Setting Up the Multimeter:
- Begin by selecting the capacitance (C) mode on your multimeter. This mode is specifically designed for measuring capacitance.
- Adjust the range settings on the multimeter to match the expected capacitance value of the capacitor being tested. Selecting the appropriate range ensures accurate readings.
3. Testing Procedure:
- Once the multimeter is set up, proceed with the following steps to test the capacitor:
- Discharge the capacitor: To ensure safety, use a resistor or other suitable method to discharge the capacitor and remove any stored charge.
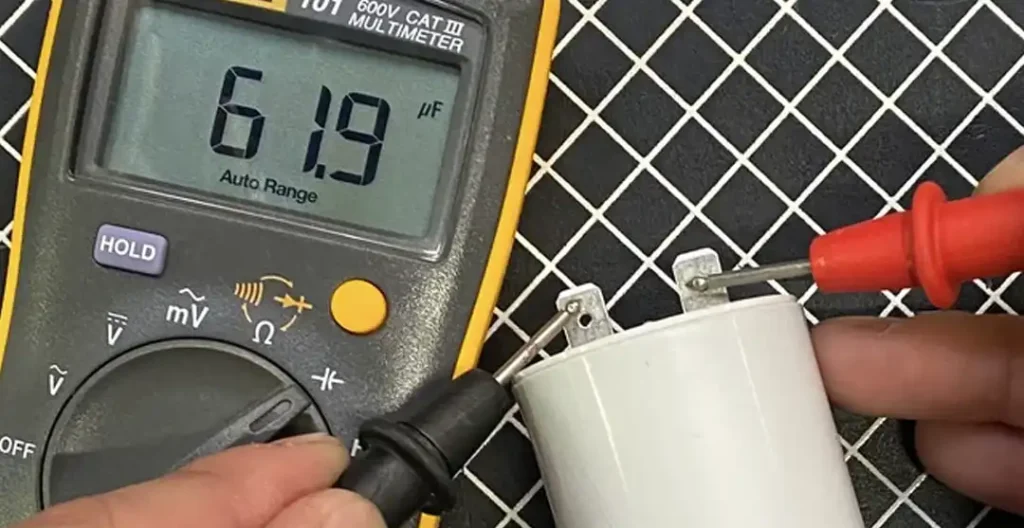
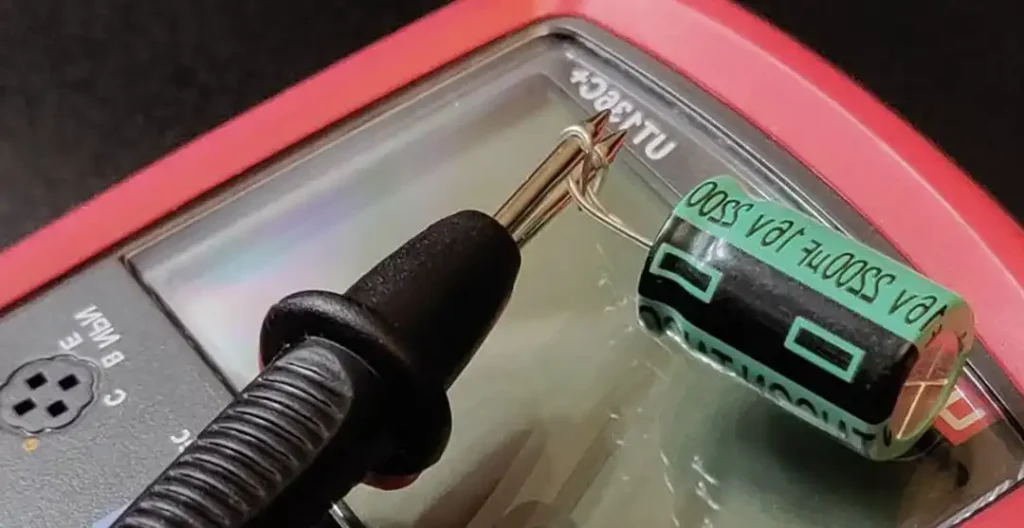
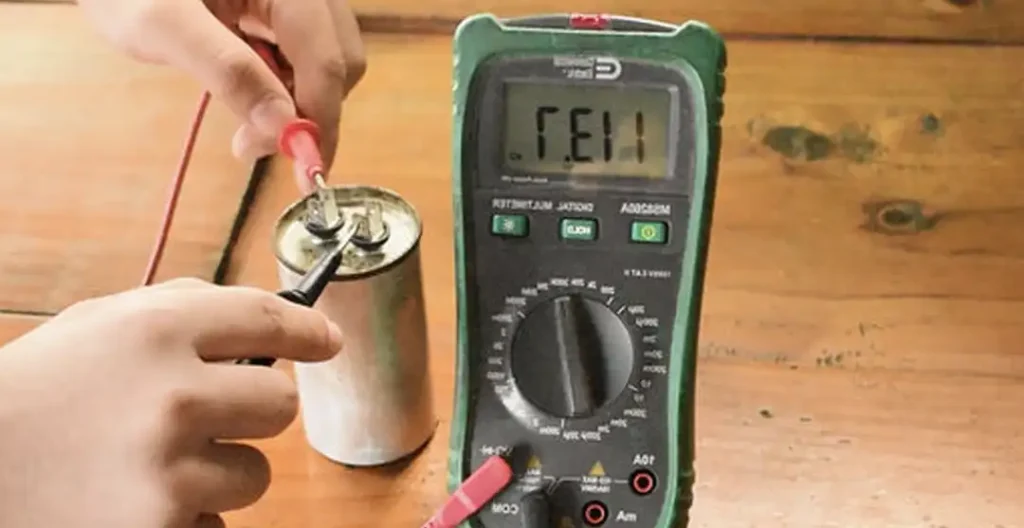
- Connect the multimeter probes: Attach the positive (red) probe to the positive terminal of the capacitor and the negative (black) probe to the negative terminal.
- Read the capacitance value: The multimeter will display the capacitance value of the capacitor in farads (F) or microfarads (μF). Take note of the reading.
- Interpret the results: Compare the measured capacitance value with the expected value for the capacitor. Significant deviations may indicate a faulty or degraded capacitor.
4. Additional Considerations:
- Ensure proper polarity: When connecting the multimeter probes to the capacitor terminals, observe polarity if applicable. Reversing the polarity may result in inaccurate readings.
- Repeat measurements: For added accuracy, repeat the capacitance measurement multiple times and take the average value.
- Verify functionality: Capacitor testing is just one aspect of circuit troubleshooting. If the capacitor appears to be functioning correctly, consider other potential causes of circuit issues.
Multimeter Capacitor Tester
- Multimeters equipped with dedicated capacitor testing features simplify the testing process.
- These testers provide precise measurements and are often preferred for professional applications.
Considerations for Capacitor Testing
- Multimeter Settings for Capacitor Testing:
- Set your multimeter to the appropriate capacitance measurement mode for accurate results.
- Adjust the range settings to match the expected capacitance value of the capacitor being tested.
- Choosing the Right Multimeter:
- When selecting a multimeter for capacitor testing, consider features such as accuracy, range, and additional functions.
- High-quality multimeters with capacitor testing capabilities offer superior performance and reliability.
Specific Methods of How to Test Capacitors With Multimeter
When it comes to testing capacitors with a multimeter, several methods are available to ensure accurate assessment and diagnosis. Each method offers unique insights into the health and functionality of the capacitor, enabling technicians and enthusiasts to pinpoint any potential faults or issues.
From utilizing specialized modes on the multimeter to employing simple yet effective techniques, the methods outlined below provide comprehensive approaches to testing capacitors with confidence and precision. By understanding and applying these methods, you can effectively troubleshoot electronic circuits and ensure optimal performance and reliability.
Let’s explore these methods in detail to equip you with the knowledge and skills needed to master the art of capacitor testing with a multimeter.
Method 1: Use the capacitance mode on the multimeter
- This method involves utilizing the capacitance mode feature of the multimeter to directly measure the capacitance of the capacitor. Steps:
- Set the multimeter to the capacitance (C) mode.
- Ensure the capacitor is discharged to avoid any electrical hazards.
- Connect the multimeter probes to the capacitor terminals, observing polarity if applicable.
- Read the capacitance value displayed on the multimeter.
Method 2: Use the Resistance (Ω) mode on the multimeter
- In this approach, the resistance mode of the multimeter is employed to indirectly assess the health of the capacitor by examining its charging and discharging behavior. Steps:
- Set the multimeter to the resistance (Ω) mode.
- Discharge the capacitor to remove any stored charge.
- Connect the multimeter probes to the capacitor terminals, ensuring correct polarity.
- Monitor the resistance reading on the multimeter as the capacitor charges and discharges.
Method 3: Use a simple voltmeter to test a capacitor
- This method involves utilizing a voltmeter to determine if the capacitor can hold a charge. Steps:
- Discharge the capacitor to ensure safety.
- Connect the voltmeter to the capacitor terminals, respecting polarity.
- Apply a voltage to the capacitor and observe if it holds the voltage over time.
- A capacitor that cannot hold a charge or quickly discharges may be faulty.
Method 4: Use the continuity mode of a multimeter to check the capacitor
- Continuity mode can be used to test if a capacitor is short-circuited or has an open circuit. Steps:
- Set the multimeter to continuity mode.
- Discharge the capacitor.
- Place one probe on each terminal of the capacitor.
- If the multimeter beeps or shows continuity, the capacitor may be shorted.
- If there’s no continuity, the capacitor may have an open circuit.
Method 5: Use the time constant parameter to check the capacitor
- This method involves observing the time constant of the capacitor’s charging and discharging process to assess its health. Steps:
- Discharge the capacitor.
- Apply a known voltage to the capacitor through a resistor.
- Measure the time it takes for the voltage across the capacitor to reach a certain percentage of its final value.
- Compare the measured time constant with the expected value for a healthy capacitor.
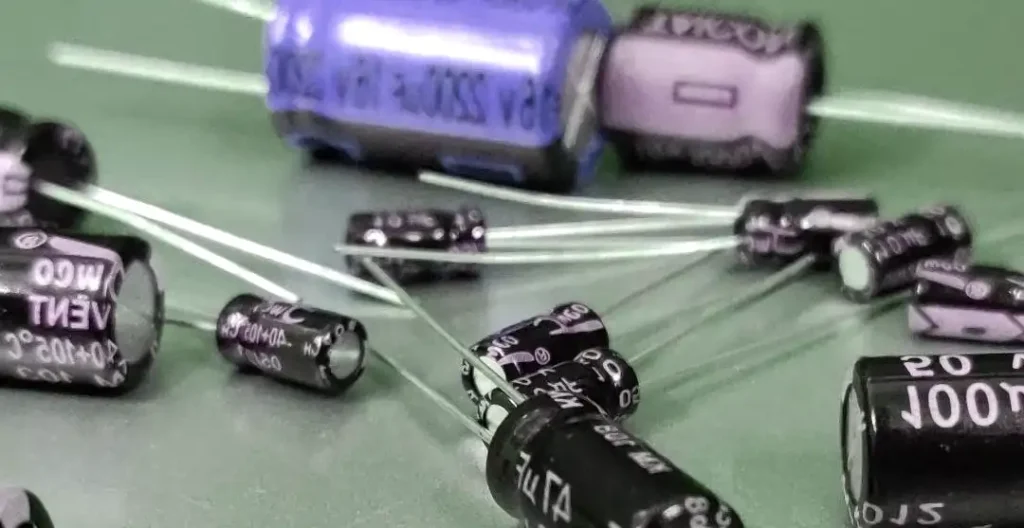
Method 6: Check the capacitor visually for faults
- Visual inspection can reveal physical defects such as bulging, leaking, or damaged terminals. Steps:
- Examine the capacitor for any signs of physical damage, such as bulging or leaking.
- Check for corrosion or discoloration around the terminals.
- Ensure the capacitor is securely mounted and not loose or damaged.
Method 7: Traditional method to check a capacitor
- This method involves using a simple circuit with a known resistor and a power source to test the capacitor’s charging and discharging behavior. Steps:
- Build a simple circuit consisting of a resistor, capacitor, and power source.
- Apply power to the circuit and observe the voltage across the capacitor over time.
- Compare the observed voltage curve with the expected behavior for a healthy capacitor.
- Any deviation from the expected curve may indicate a faulty capacitor.
Various Ways on How to Test a Capacitor?
How to Test a Capacitor with a Multimeter
Testing a capacitor with a multimeter is a straightforward process that allows you to determine if the capacitor is functioning correctly.
Here’s a step-by-step guide on how to perform this test:
Set the Multimeter to Capacitance Mode:
Turn on your multimeter and select the capacitance (C) mode. This mode is specifically designed for measuring capacitance.
Discharge the Capacitor:
Before testing, discharge the capacitor to remove any stored charge. This reduces the risk of electrical shock during testing.
Connect the Multimeter Probes:
Take the capacitor out of the circuit if possible.
Connect the positive (red) probe of the multimeter to the positive terminal of the capacitor.
Connect the negative (black) probe of the multimeter to the negative terminal of the capacitor.
Read the Capacitance Value:
Once the probes are connected, the multimeter will display the capacitance value of the capacitor in farads (F) or microfarads (μF).
Take note of the reading displayed on the multimeter.
Interpret the Results:
Compare the measured capacitance value with the expected value for the capacitor.
Significant deviations from the expected value may indicate a faulty or degraded capacitor.
Repeat the Test (Optional):
For added accuracy, you can repeat the capacitance measurement multiple times and take the average value.
Disconnect and Reassemble:
After testing, disconnect the multimeter probes from the capacitor terminals.
If the capacitor is functioning correctly, you can reinstall it in the circuit.
By following these steps, you can effectively test a capacitor with a multimeter and ensure the proper functioning of electronic circuits.
How to Check Capacitor with an Ohm Meter
Checking a capacitor with an ohmmeter, also known as a resistance (Ω) meter, can provide valuable insights into the health of the capacitor.
Here’s how to perform this test:
Set the Multimeter to Resistance Mode (Ohmmeter):
Turn on your multimeter and select the resistance (Ω) mode. This mode is used to measure resistance in ohms.
Discharge the Capacitor:
Before testing, discharge the capacitor to remove any stored charge for safety.
Connect the Multimeter Probes:
Take the capacitor out of the circuit if possible.
Connect the positive (red) probe of the multimeter to the positive terminal of the capacitor.
Connect the negative (black) probe of the multimeter to the negative terminal of the capacitor.
Observe the Ohmmeter Reading:
The ohmmeter will display the resistance reading. A healthy capacitor should initially show low resistance, indicating that it is charging.
Monitor the Resistance:
Over time, the resistance should increase as the capacitor charges. This gradual increase in resistance is normal.
Interpret the Results:
If the resistance remains low or does not change significantly, it may indicate a shorted or leaky capacitor.
If the resistance remains high or infinite, it may indicate an open or faulty capacitor.
By checking the capacitor with an ohmmeter, you can assess its integrity and identify potential issues that may affect circuit performance.
How to Measure Capacitor with a Voltmeter
Measuring a capacitor with a voltmeter allows you to verify if the capacitor can hold a charge. Here’s how to perform this test:
Set the Multimeter to Voltage Mode:
Turn on your multimeter and select the voltage (V) mode. This mode is used to measure voltage in volts.
Discharge the Capacitor:
Before testing, discharge the capacitor to remove any stored charge for safety.
Connect the Multimeter Probes:
Take the capacitor out of the circuit if possible.
Connect the positive (red) probe of the multimeter to the positive terminal of the capacitor.
Connect the negative (black) probe of the multimeter to the negative terminal of the capacitor.
Apply Voltage to the Capacitor:
Apply a known voltage to the capacitor by briefly connecting a voltage source across its terminals.
Observe the Voltmeter Reading:
The voltmeter will display the voltage across the capacitor. A healthy capacitor should be able to hold the applied voltage over time.
Monitor Voltage Decay (Optional):
Over time, monitor the voltage decay across the capacitor. A capacitor that rapidly discharges may indicate a faulty component.
Interpret the Results:
If the capacitor can hold the applied voltage within an acceptable range, it is likely functioning correctly.
If the capacitor cannot hold the voltage or rapidly discharges, it may indicate a faulty or degraded capacitor.
By measuring the capacitor with a voltmeter, you can verify its ability to hold a charge and ensure reliable performance in electronic circuits.
Conclusion
Congratulations! You’ve now mastered the art of testing capacitors with a multimeter.
By following the simple steps outlined in this guide, you can confidently assess the health and functionality of capacitors in electronic circuits. Whether you’re a hobbyist or a professional, knowing how to test capacitors accurately is a valuable skill that will serve you well in your electronic projects and troubleshooting endeavors.
With your newfound knowledge, you can ensure the smooth operation and reliability of your circuits, saving time and effort in diagnosing and resolving issues. Keep exploring and experimenting with your multimeter, and you’ll continue to expand your understanding of electronics. Happy testing!