In every home or building, circuit breakers play a crucial role in protecting electrical circuits from overloads and faults, ensuring safety and preventing potential hazards.
Properly labeling these circuit breakers is essential for easy identification and maintenance, as well as for ensuring the safety of occupants and electricians working on the system. In this guide, we’ll explore the various methods and best practices for labeling circuit breakers in English.
Types of Circuit Breakers
Standard Circuit Breakers
Standard circuit breakers are the most common type found in residential and commercial electrical systems. They are designed to protect circuits from overloads and short circuits.
Ground Fault Circuit Interrupters (GFCIs)
GFCIs are specialized circuit breakers that protect against ground faults, which occur when electrical current leaks to the ground. They are commonly used in areas where water is present, such as bathrooms and kitchens.
Arc Fault Circuit Interrupters (AFCIs)
AFCIs are designed to detect and mitigate the risk of electrical arcs, which can cause fires. They are typically used in bedrooms and other areas where arc faults may occur.
Combination AFCI/GFCI Breakers
Combination AFCI/GFCI breakers provide both arc fault and ground fault protection in a single device, offering comprehensive safety coverage.
Dual Function Circuit Interrupters (DFCIs)
DFCIs combine the functionality of GFCIs and AFCIs, providing protection against both ground faults and arc faults.
What Are Circuit Breaker Labels
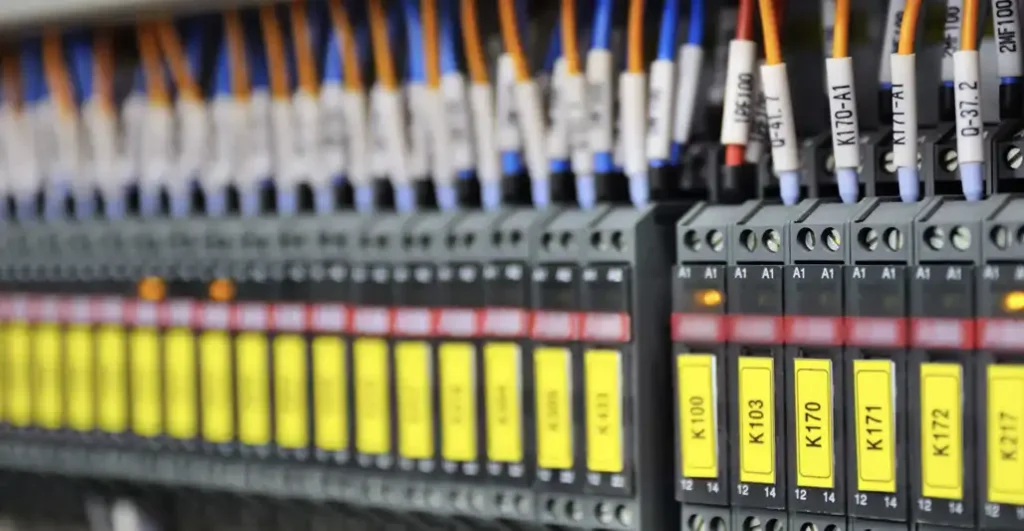
Circuit breaker labels are identification markers affixed to circuit breakers within an electrical panel or distribution board. These labels serve the purpose of clearly indicating the function, location, and voltage rating of each circuit breaker.
They provide essential information for electricians, maintenance personnel, and occupants of a building to easily identify and understand the purpose of each circuit. Properly labeled circuit breakers contribute to electrical safety by facilitating troubleshooting, maintenance, and the safe operation of electrical systems.
Circuit Breaker Label Template
Creating a clear and effective circuit breaker label template is crucial for maintaining organization and safety in your electrical panel. Below is a template you can use to label your circuit breakers.
Template Layout
| Circuit Breaker Number | Circuit Description | Location/Area | Voltage | Date of Labeling | Notes |
|---|---|---|---|---|---|
| 1 | Kitchen Outlets | Kitchen | 120V | 01/01/2024 | |
| 2 | Living Room Lights | Living Room | 120V | 01/01/2024 | |
| 3 | HVAC System | Basement | 240V | 01/01/2024 | |
| 4 | Bathroom GFCI | Bathroom | 120V | 01/01/2024 | |
| 5 | Washer/Dryer | Laundry Room | 240V | 01/01/2024 | |
| 6 | Spare | N/A | N/A | 01/01/2024 |
Key Components of the Template
- Circuit Breaker Number: This is the unique identifier for each breaker in your panel.
- Circuit Description: A brief description of what the circuit controls (e.g., “Kitchen Outlets,” “Living Room Lights”).
- Location/Area: The specific location or area that the circuit serves.
- Voltage: The voltage rating of the circuit (e.g., 120V, 240V).
- Date of Labeling: The date when the label was created or updated.
- Notes: Any additional information that might be useful, such as specific appliances connected to the circuit or special instructions.
Tips for Creating and Using Circuit Breaker Labels
- Consistency: Use a consistent format and terminology across all labels to avoid confusion.
- Legibility: Ensure that the text is clear and easy to read. Use durable, weather-resistant labels to maintain readability over time.
- Accuracy: Double-check each circuit’s description and location to ensure the information is accurate.
- Updates: Regularly update the labels if any changes are made to the circuits or if new circuits are added.
- Safety: Always follow safety guidelines when working with electrical panels. Turn off power to the panel before labeling.
By using this template and adhering to these tips, you can maintain an organized and safe electrical system that is easy to manage and troubleshoot.
Circuit Breaker Labeling Requirements
Proper labeling of circuit breakers is crucial for ensuring safety, efficiency, and compliance with electrical codes and standards. Below are the key requirements for labeling circuit breakers effectively:
1. Clear Identification
- Descriptive Labels: Each circuit breaker must be labeled with a clear, descriptive name indicating its function. For example, “Kitchen Outlets” or “Living Room Lights.”
- Consistent Terminology: Use consistent terminology to avoid confusion.
2. Location Information
- Specific Areas: Labels should specify the exact area or room that each circuit breaker controls, such as “Bathroom GFCI” or “Basement Lights.”
3. Voltage Rating
- Voltage Specification: Include the voltage rating of the circuit on the label, such as 120V or 240V, to provide essential information for safety and maintenance.
4. Compliance with Codes
- NEC Compliance: Follow the National Electrical Code (NEC) requirements for labeling. The NEC mandates that circuit directories must be legible and clearly identify the specific purpose of each circuit breaker.
- Local Regulations: Ensure compliance with any additional local regulations and codes that may apply.
5. Legibility and Durability
- Readable Fonts: Use fonts that are easy to read, even in low light conditions.
- Durable Materials: Labels should be made from durable, weather-resistant materials to ensure they remain legible over time.
6. Accurate and Up-to-Date Information
- Regular Updates: Update labels whenever changes are made to the electrical system, such as adding new circuits or reconfiguring existing ones.
- Correct Information: Verify that all information on the labels is accurate and corresponds to the correct circuit breaker.
7. Placement of Labels
- Visible Positioning: Labels should be placed in a visible and easily accessible location on or near the circuit breaker.
- Avoid Obstructions: Ensure that labels are not obstructed by other components or wiring.
8. Additional Information
- Spare Breakers: Label spare breakers to indicate that they are not currently in use, but available for future use.
- Special Instructions: Include any special instructions or warnings that may be necessary for specific circuits, such as “Do Not Turn Off” for critical systems.
9. Safety Precautions
- Turn Off Power: Always turn off power to the circuit breaker panel before labeling to prevent electrical shock.
- Use Proper Tools: Use appropriate tools and protective equipment when working with electrical panels.
10. Documentation
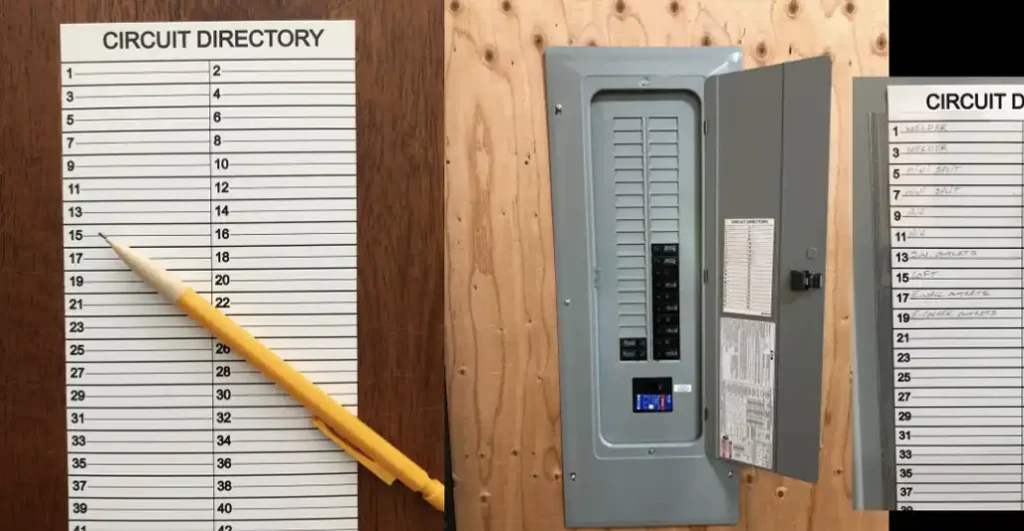
- Circuit Directory: Maintain a circuit directory that provides a detailed map of the electrical system, including all labeled circuit breakers.
- Backup Records: Keep a backup copy of the circuit directory in a safe location, separate from the electrical panel.
By adhering to these requirements, you can ensure that your circuit breakers are labeled clearly and accurately, enhancing the safety and efficiency of your electrical system. Proper labeling not only aids in troubleshooting and maintenance but also ensures compliance with regulatory standards, contributing to overall safety.
Circuit Breaker Labeling Methods
Labeling circuit breakers is essential for safety, maintenance, and troubleshooting. There are various methods available, each with its advantages and suited for different situations. Below, we explore both traditional and modern methods for labeling circuit breakers.
Traditional Methods
1. Handwritten Labels
Description: Handwritten labels involve manually writing the circuit information on a label using a pen or marker.
Advantages:
- Quick and Easy: Requires no special equipment.
- Customizable: Allows for immediate adjustments and detailed notes.
Disadvantages:
- Legibility Issues: Handwriting can be difficult to read, especially over time.
- Durability: Handwritten labels may fade or smear.
Best Practices:
- Use a permanent marker for durability.
- Write clearly and legibly.
- Protect the label with clear adhesive tape to prevent smudging.
2. Pre-printed Labels
Description: Pre-printed labels are commercially available labels with common circuit descriptions already printed on them.
Advantages:
- Professional Appearance: Neat and uniform labels.
- Convenience: Ready to use with common circuit descriptions.
Disadvantages:
- Limited Customization: May not cover all specific circuit needs.
Best Practices:
- Choose a set with a wide range of descriptions.
- Supplement with handwritten notes if necessary.
Modern Methods
1. Label Makers
Description: Label makers are electronic devices that print custom labels on adhesive tape.
Advantages:
- Customizable: Allows for specific and detailed labeling.
- Professional Look: Produces clear, easy-to-read labels.
Disadvantages:
- Cost: Initial investment in the device and tape refills.
- Learning Curve: Requires some familiarity with the device.
Best Practices:
- Use high-quality tape that adheres well and is durable.
- Test the label maker to ensure proper font size and readability.
2. Engraved Labels
Description: Engraved labels are made from metal or plastic and have the circuit information engraved onto them.
Advantages:
- Durability: Extremely durable and long-lasting.
- Professional and Permanent: Ideal for industrial and commercial settings.
Disadvantages:
- Cost: Higher initial cost for engraving.
- Inflexibility: Not easily changed once made.
Best Practices:
- Use for critical and permanent labeling needs.
- Ensure the engraving includes all necessary information clearly.
3. Printable Labels
Description: Printable labels are created using a computer and printed on adhesive label sheets.
Advantages:
- Flexibility: High degree of customization.
- Professional Quality: Can include graphics and detailed text.
Disadvantages:
- Durability: Dependent on the quality of the printer and label material.
- Time-Consuming: Requires design and printing setup.
Best Practices:
- Use high-quality, weather-resistant label paper.
- Protect printed labels with a clear laminate for durability.
4. Digital Apps
Description: Some apps allow users to create and manage circuit breaker labels digitally, often using a smartphone or tablet.
Advantages:
- Convenience: Easy to update and manage labels.
- Integration: Can integrate with other digital tools and records.
Disadvantages:
- Access: Requires a compatible device and software.
- Initial Setup: May require time to set up and familiarize with the app.
Best Practices:
- Regularly sync and back up the data.
- Ensure labels are printed or displayed in an easily accessible format.
Tools and Materials Required
To label circuit breakers effectively, you’ll need the following tools and materials:
- Labeling Machine
- Labeling Tape
- Marker Pens
- Sticker Labels
- Circuit Breaker Directory Template
Preparation Steps
Before you begin labeling circuit breakers, it’s important to take the following preparation steps:
- Turn off power to the circuit breaker panel to avoid the risk of electrical shock.
- Identify each circuit and its corresponding breaker using a circuit map or diagram.
- Gather the necessary tools and materials, including a labeling machine and appropriate labeling tape.
How to Label a Circuit Breaker
Properly labeling your circuit breakers is essential for safety, maintenance, and troubleshooting. Here’s a step-by-step guide on how to effectively label circuit breakers:
Step 1: Gather Necessary Tools and Materials
Before you start, make sure you have all the tools and materials you’ll need:
- Labeling machine or label maker
- Labeling tape or pre-printed labels
- Permanent markers
- Adhesive labels or stickers
- Circuit breaker directory template
- Cleaning supplies (e.g., cloth, cleaning solution)
Step 2: Turn Off Power
Safety first. Turn off the main power supply to the circuit breaker panel to prevent electrical shock while working.
Step 3: Identify Each Circuit
Identify what each circuit controls. You can do this by:
- Turning off each breaker one at a time and noting which areas or appliances lose power.
- Using a circuit tracer tool to trace the circuit from the panel to the outlets or fixtures.
- Checking the existing labels or circuit directory for initial guidance, if available.
Step 4: Create a Circuit Map
Create a detailed circuit map or directory that lists each circuit breaker and its corresponding function. This can be done on paper or digitally.
Step 5: Clean the Circuit Breaker Panel
Clean the surface of the circuit breaker panel where you will apply the labels to ensure they stick properly and are easy to read.
Step 6: Apply Labels to Circuit Breakers
Using your chosen labeling method (handwritten, label maker, pre-printed, etc.), create labels for each circuit breaker. Include the following information on each label:
- Circuit Number: The unique identifier for each breaker.
- Description: A brief description of what the circuit controls (e.g., “Kitchen Outlets,” “Living Room Lights”).
- Location/Area: The specific area served by the circuit.
- Voltage: The voltage rating of the circuit (e.g., 120V, 240V).
Step 7: Placement of Labels
Place each label on or near the corresponding circuit breaker. Make sure the labels are:
- Visible: Easily seen without obstructions.
- Legible: Clear and easy to read.
- Consistent: Use a consistent format and placement for all labels.
Step 8: Label Spare Breakers
Label any spare breakers as “Spare” or “Unused” to avoid confusion in the future.
Step 9: Document the Circuit Directory
Update your circuit directory with the information from the labels. Keep a copy of this directory near the breaker panel and another copy in a safe location.
Step 10: Regular Maintenance
Regularly check and update the labels and directory to ensure they remain accurate and legible. This is especially important if you make changes to the electrical system, such as adding or removing circuits.
Tips for Effective Labeling
- Use Clear Language: Avoid technical jargon and use simple, clear descriptions.
- Include Circuit Descriptions: Detail the primary use or appliances connected to each circuit.
- Consistent Format: Use the same format for all labels to avoid confusion.
- Regular Inspections: Periodically inspect the labels to ensure they are still legible and intact.
- Safety Precautions: Always follow safety guidelines and turn off power before working on the panel.
Conclusion
Properly labeling your circuit breakers is a straightforward process that enhances the safety and efficiency of your electrical system. By following these steps and maintaining accurate labels, you ensure that anyone needing to work with your electrical system can do so safely and effectively.
Tips for Effective Labeling
- Use clear and consistent language to describe each circuit.
- Include detailed circuit descriptions to aid in troubleshooting and maintenance.
- Label spare breakers to prevent confusion and ensure proper usage.
- Regularly inspect and maintain labels to ensure readability and accuracy.
FAQs
What information should be included on a circuit breaker label?
A circuit breaker label should include the circuit’s location or function, voltage rating, and any specific equipment or appliances connected to the circuit.
Can I use different colors for different circuits?
Using different colors for different circuits can aid in visual identification, but it’s important to ensure that colors are used consistently and in accordance with safety guidelines.
Are there regulations or codes for circuit breaker labeling?
While there are no specific regulations governing circuit breaker labeling, it’s recommended to follow industry best practices and guidelines for safety and clarity.
How often should circuit breaker labels be updated?
Circuit breaker labels should be updated whenever changes are made to the electrical system or circuitry, such as adding or removing circuits or equipment.
Conclusion
Properly labeling circuit breakers is essential for maintaining a safe and efficient electrical system. By following the methods and best practices outlined in this guide, you can ensure clear identification of circuits and promote safety for occupants and electricians alike.