Installing a circuit breaker is a fundamental aspect of electrical work, ensuring safety and proper functioning of electrical systems. Whether you’re a seasoned electrician or a DIY enthusiast, understanding the process is crucial.
In this guide, we’ll walk through the steps required to install a circuit breaker effectively and safely. From gathering the necessary tools to wiring the breaker into your electrical panel, we’ll cover each step in detail to help you complete the installation with confidence.
Let’s dive in and learn how to install a circuit breaker properly.
How to Install a Circuit Breaker

Let’s delve deeper into each step of the circuit breaker installation process:
Prepare for Safety: Safety should always be the top priority when working with electricity. Before you begin, switch off the main power supply to the electrical panel to prevent any potential accidents or shocks. Use appropriate personal protective equipment (PPE) such as insulated gloves and safety goggles.
Gather Necessary Tools and Materials: Having the right tools and materials on hand will make the installation process smoother. Double-check that you have the correct circuit breaker for your panel, as well as the tools mentioned earlier. It’s essential to use tools and materials rated for electrical work to ensure safety and proper installation.
Identify the Circuit: Determine which circuit you’re working on, whether it’s a new installation or a replacement. This will help you understand the wiring requirements and ensure you’re installing the correct breaker.
Select the Location in the Electrical Panel: Choose an appropriate slot in the electrical panel for the new circuit breaker. Avoid overcrowding or overloading any single panel space. Refer to the panel’s documentation or consult with an electrician if you’re unsure about the best location.
Prepare the Wires: If you’re adding a new circuit, prepare the wires by stripping the insulation from the ends. Use wire strippers to remove the appropriate amount of insulation, being careful not to damage the conductors. Ensure that the wires are long enough to reach the breaker terminals comfortably.
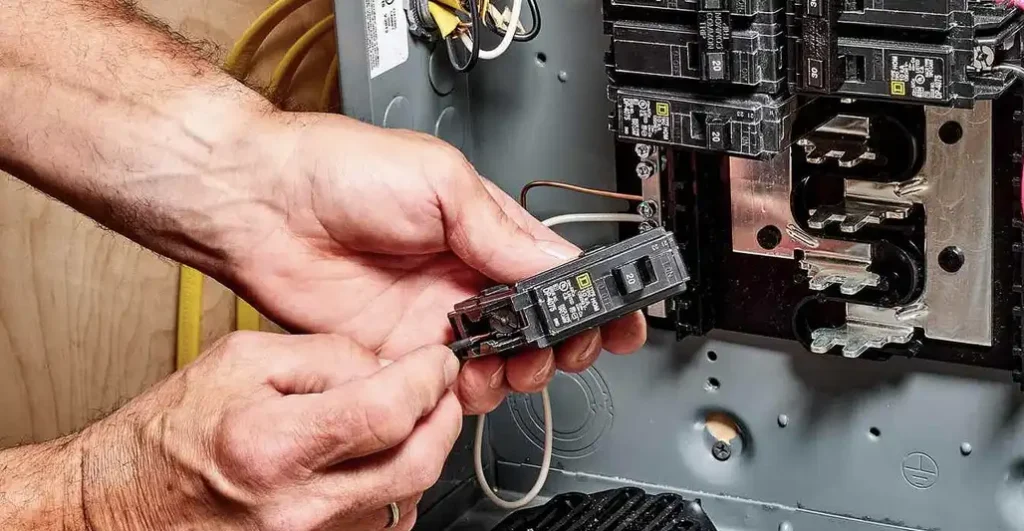
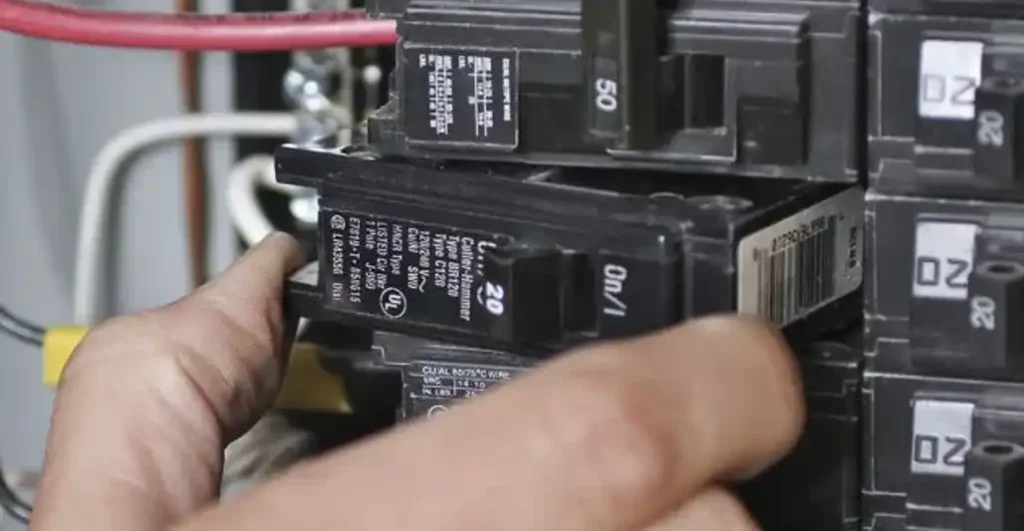
Mount the Circuit Breaker: Carefully insert the circuit breaker into the chosen slot in the electrical panel. Align the breaker’s connection points with the bus bars inside the panel. Push the breaker firmly into place until it snaps securely onto the bus bars.
Connect the Wires: Attach the wires to the appropriate terminals on the circuit breaker. Typically, the hot wire (black or red) connects to the breaker’s terminal screw, while the neutral wire (white or gray) and ground wire (green or bare copper) connect to their respective terminals. Follow the manufacturer’s instructions and ensure tight, secure connections.
Test for Voltage: Before proceeding further, use a voltage tester to confirm that there is no voltage present on the wires or the breaker. Test each wire individually to ensure safety. If voltage is detected, double-check your connections and troubleshoot as needed.
Secure the Breaker: Once you’ve confirmed the connections and voltage, secure the circuit breaker in place using the provided screws or clips. Ensure that the breaker is firmly seated and does not move or wiggle within the panel.
Close the Electrical Panel: Carefully close the panel door and secure it with the screws or latches. Make sure there are no loose wires or tools left inside the panel before closing it.
Turn On the Power: After everything is securely in place, it’s time to restore power to the panel. Switch the main power supply back on and test the circuit breaker by flipping it to the “on” position. Verify that the connected devices or outlets are receiving power as expected.
Label the Breaker: To facilitate future maintenance or troubleshooting, label the circuit breaker in the electrical panel to indicate which circuit it controls. This labeling should be clear and easy to read, helping you or others identify the circuit quickly if needed.
By following these detailed steps and exercising caution throughout the installation process, you can install a circuit breaker safely and effectively. If you encounter any difficulties or uncertainties, don’t hesitate to seek assistance from a qualified electrician. Electrical work can be hazardous, so it’s always better to err on the side of caution and ensure the job is done right.
Cost to Install a New Circuit Breaker

How much does it cost to install a circuit breaker?
The circuit breaker panel installation costcan vary depending on several factors, including the complexity of the installation, the type of electrical panel, local labor rates, and any additional materials required. On average, homeowners can expect to pay between $150 to $300 for a basic circuit breaker installation by a licensed electrician.
However, this cost may increase if:
- Panel Upgrade: If your electrical panel needs to be upgraded or replaced to accommodate the new circuit breaker, the total cost will be higher. Panel upgrades can range from $1,000 to $3,000 or more, depending on the size and complexity of the panel.
- Permit Fees: Some jurisdictions require permits for electrical work, which can add to the overall cost of the installation. Permit fees vary depending on your location but typically range from $50 to $200.
- Material Costs: Additional materials such as wires, connectors, and mounting hardware may be needed, especially if you’re installing a new circuit from scratch. These costs can vary depending on the specific requirements of your project.
- Labor Rates: Electricians may charge higher rates for more complex installations or projects that require specialized skills. Rates can also vary depending on the region and local market conditions.
- Emergency Service: If you require emergency or after-hours service for the installation, expect to pay higher labor rates.
It’s essential to get multiple quotes from licensed electricians in your area to ensure you’re getting a fair price for the installation. Additionally, be wary of unusually low quotes, as they may indicate subpar workmanship or the use of inferior materials. Investing in a quality installation by a professional electrician can help ensure the safety and reliability of your electrical system.
| Cost Factor | Average Cost Range | Additional Information |
|---|---|---|
| Basic Installation | $150 – $300 | Cost for installing a single circuit breaker by a licensed electrician |
| Panel Upgrade | $1,000 – $3,000 | Additional cost if the electrical panel needs to be upgraded or replaced |
| Permit Fees | $50 – $200 | Cost of permits required for electrical work, varies by location |
| Material Costs | Varies | Additional materials such as wires, connectors, and hardware |
| Labor Rates | Varies | Rates may vary based on complexity of the installation and local market conditions |
| Emergency Service | Higher Rates | Additional charges for after-hours or emergency service |
Keep in mind that these costs are estimates and actual prices may vary based on factors such as the specific requirements of your project, regional labor rates, and the expertise of the electrician. It’s advisable to obtain quotes from multiple professionals to ensure you’re getting a fair price for the installation.
Conclusion
In conclusion, installing a circuit breaker is a critical task that requires careful attention to safety, proper technique, and adherence to electrical codes and regulations. By following the step-by-step process outlined above and enlisting the help of a qualified electrician when needed, you can ensure a successful installation that provides reliable protection for your electrical system.
Remember to prioritize safety at all times, double-check your connections, and seek professional assistance if you encounter any difficulties. With the right approach, installing a circuit breaker can be a manageable project that enhances the safety and functionality of your home’s electrical infrastructure.